V8R sloooww build - 94 Miata - North Carolina

 02-23-2013, 12:49 AM
#1
V8 Miata Fanatic

Thread Starter

Well, this will be a first for me on several levels -- 1st V8 swap, 1st MAJOR build project, and 1st discussion-forum thread to post on and update throughout a project. I've been the beneficiary of MANY others who contribute their knowledge and vital steps as they do clutch jobs, timing belts, brakes, whatever. The internet and various automotive forums have served me well so now's the right time and place to put this project out there with a little historical perspective as well.
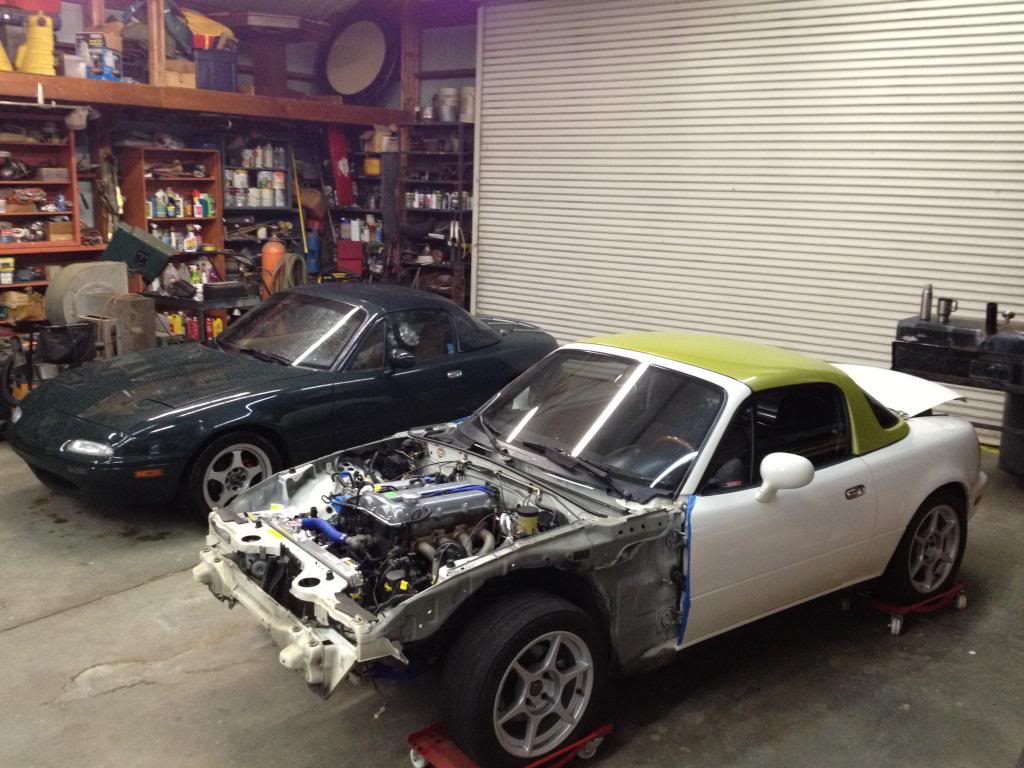
Been playing with Miatas since fall of 1990 when I picked up my only "new-to-me" '91 base package white one... That's been a while... & later sold it to raise some down-payment on the first house purchase in '93. Fast forward to 2013 and I've now had a total of 14 misfit Miatas... Ya know, the ones that sit on the 3rd row of a bad used car lot, the one with the 3rd connecting rod busted thru the block, the one that sat at the local towing co for 36 months with no back window... Yup, those became my passion. Fixing, repairing, replacing, driving, and re-selling.
And all along, I held onto this '94 white that I've steadily updated and played with.
 02-23-2013, 01:05 AM
#2
V8 Miata Fanatic
Thread Starter
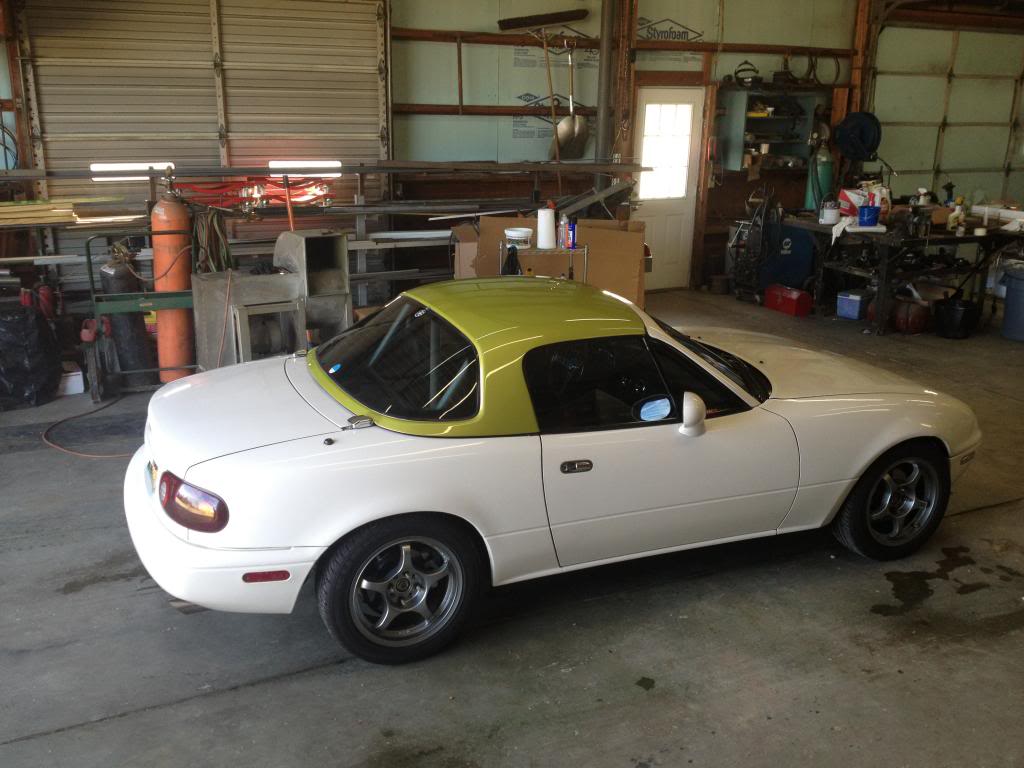
Quick rundown on this 94:
95K miles - original paint - original softtop - clean cloth interior
'90 dash swap - HardDog HardCore Sgl Diag - mostly FM suspension -
Tein springs - RB header - Borla - FM Butterfly brace - FM brake upgrade, etc.
... But enough of that, it's time to strip her down for for a thorough build-up!
95K miles - original paint - original softtop - clean cloth interior
'90 dash swap - HardDog HardCore Sgl Diag - mostly FM suspension -
Tein springs - RB header - Borla - FM Butterfly brace - FM brake upgrade, etc.
... But enough of that, it's time to strip her down for for a thorough build-up!
02-23-2013, 01:29 AM
#3
V8 Miata Fanatic
Thread Starter
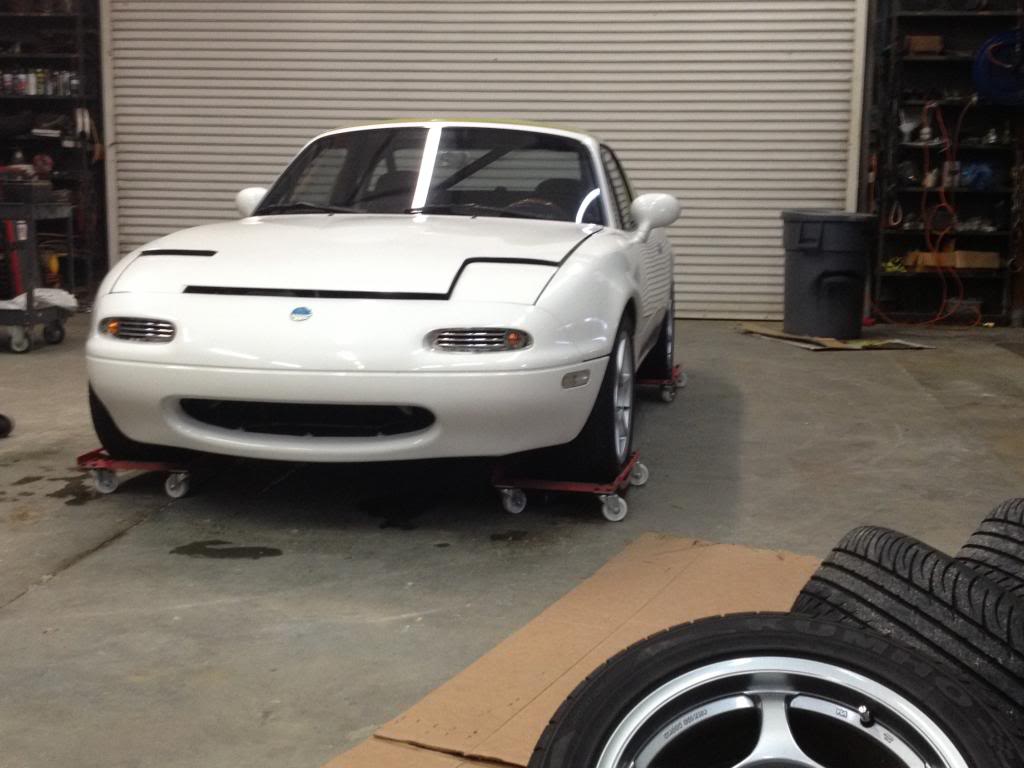
Bought this in Oct '12. LS1 w/ wiring harness, exh manifolds, A/C, P/S, alt, etc. Supposedly a later '02 according to a block casting number with LS6 attributes(per someone else) - but I didn't have that warm & fuzzy feeling about this engine. Sold it last week on Craigslist & will soon begin serious search for preferred LS2/ T56 (in partial honor of GoKart & his tremendous build!!!)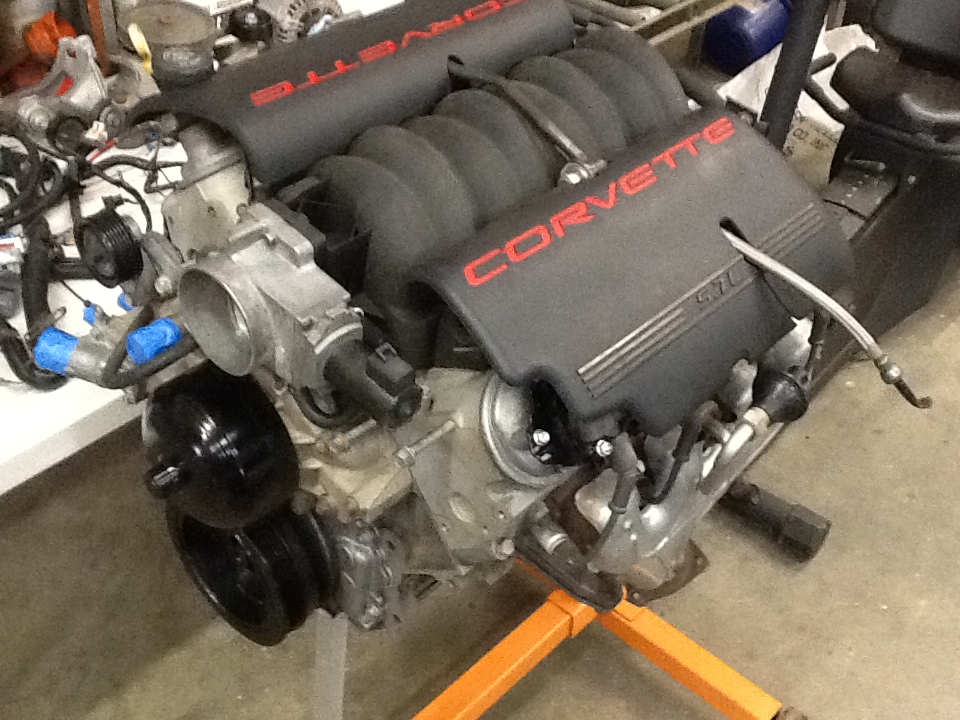
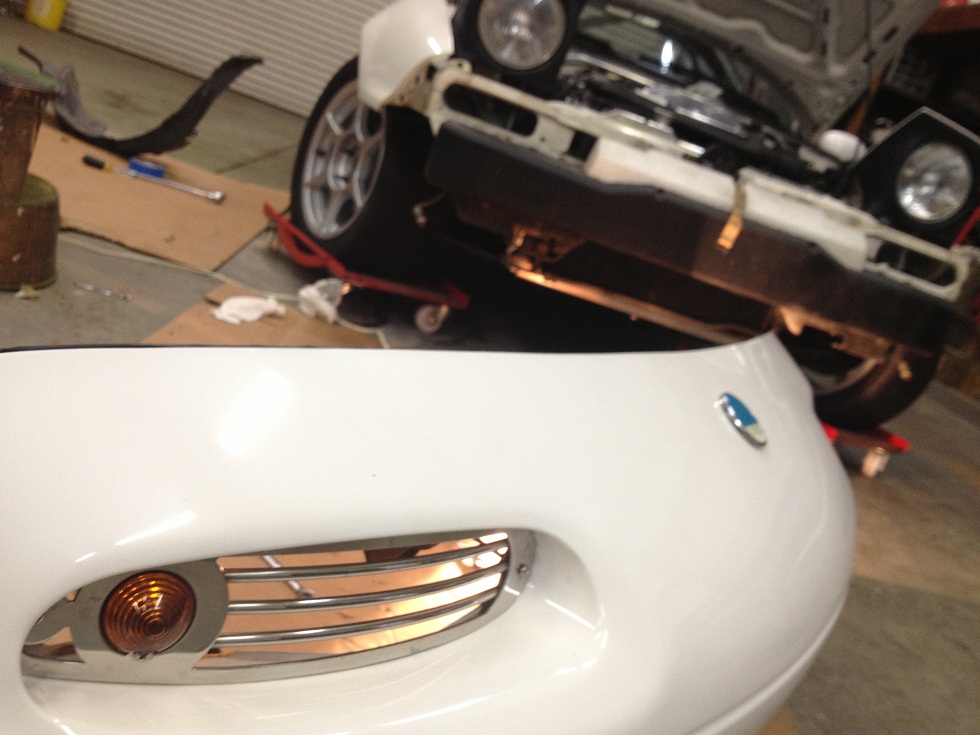
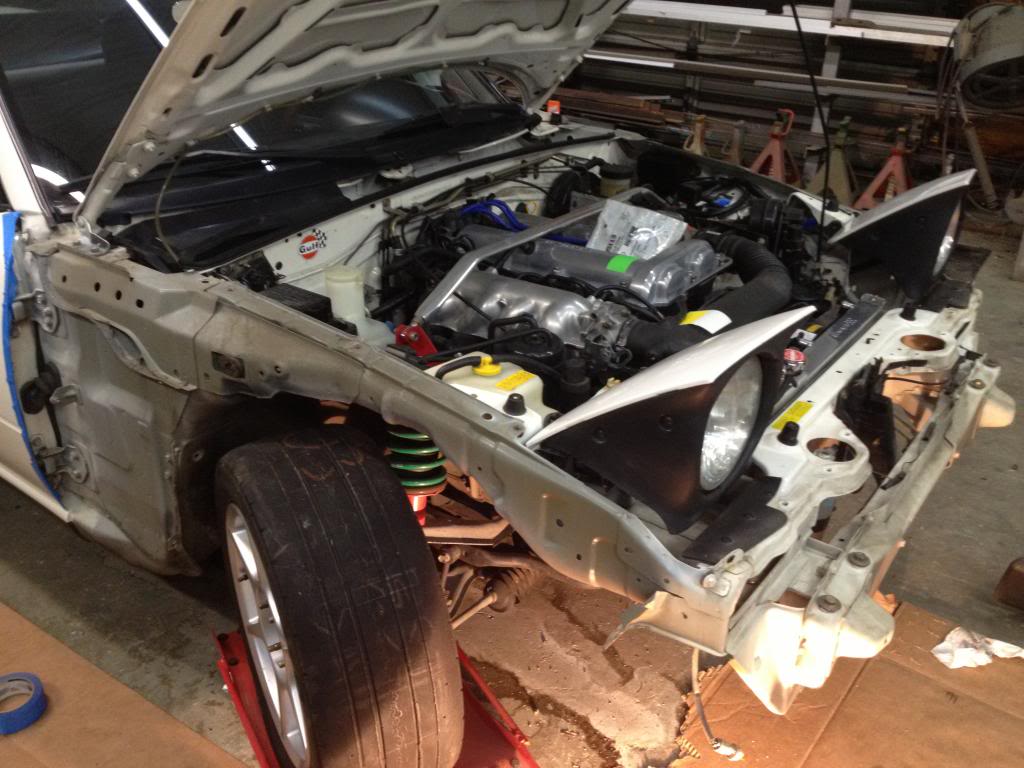
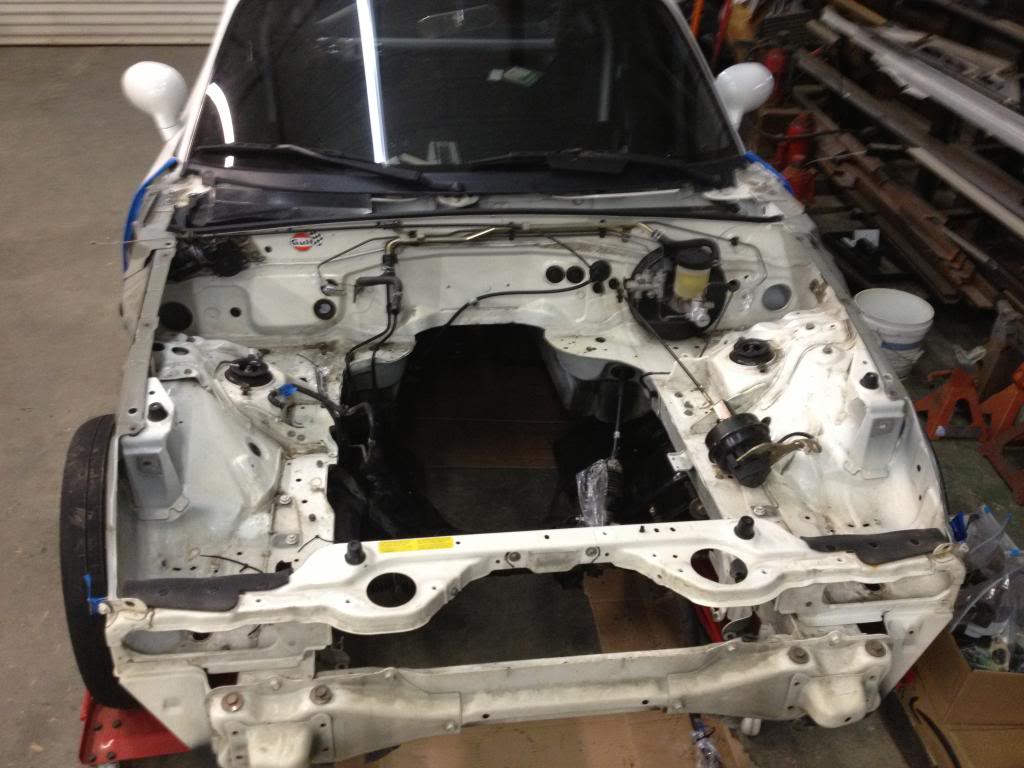
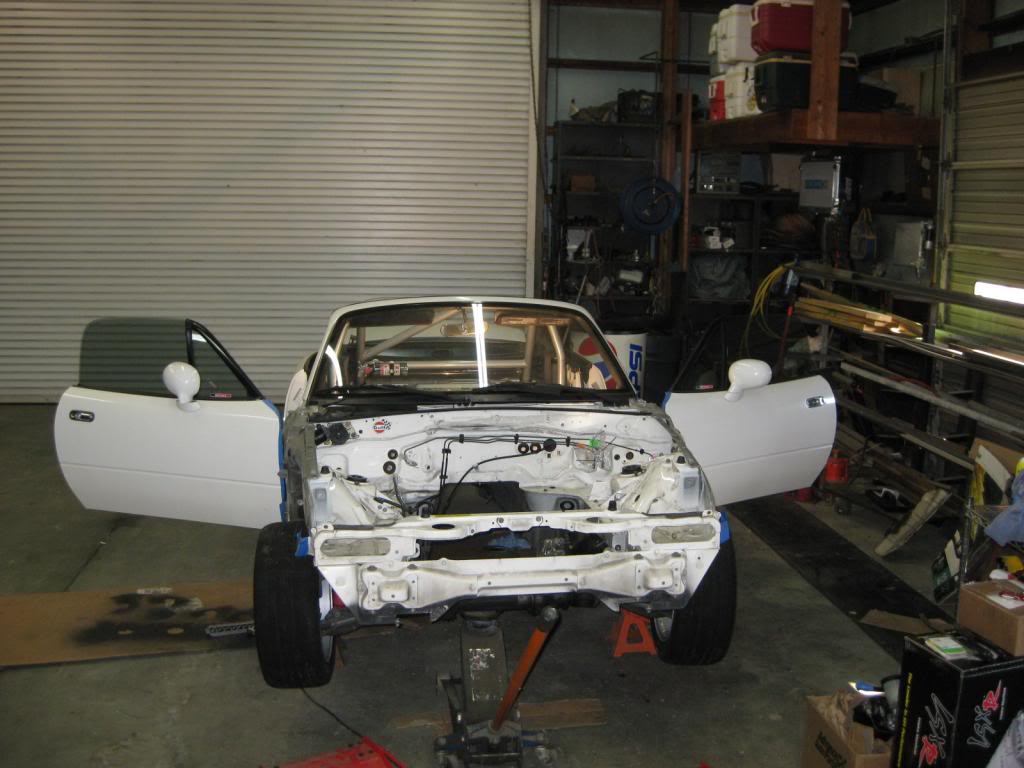
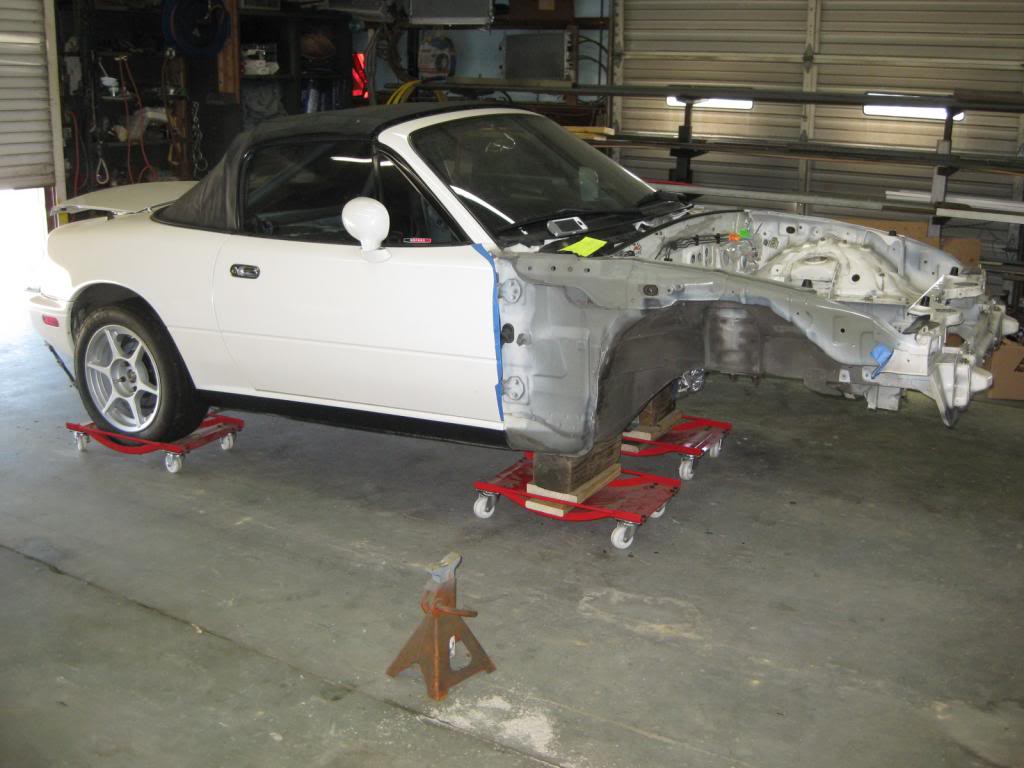
So time to keep dismantling. Empty the engine bay first...
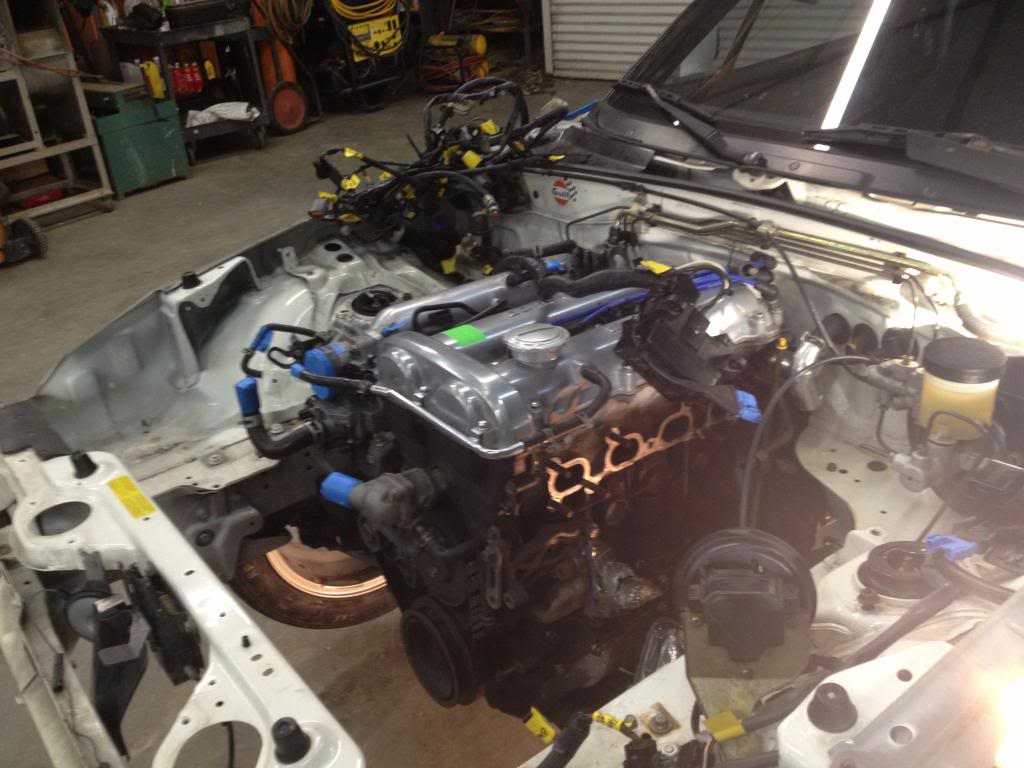
Now, remove about everything inside between the doors... Should have put the dash in with wing nuts since my '90 dash swap took place just last year. Oh well, it's a pretty simple puzzle after you do it once!
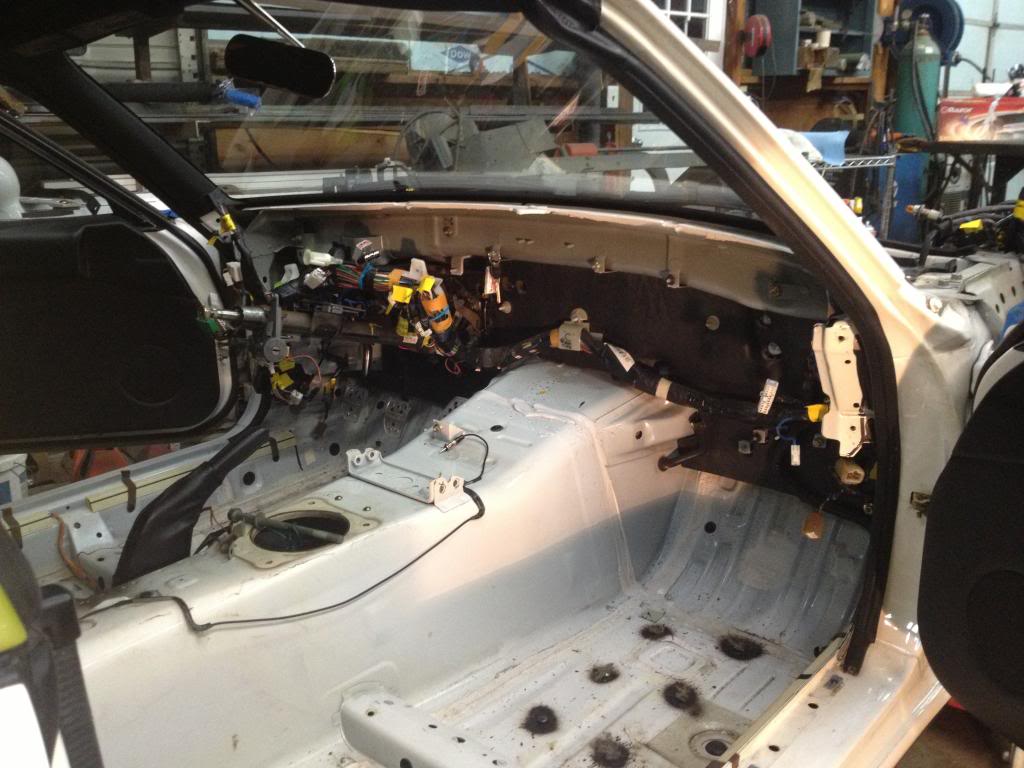
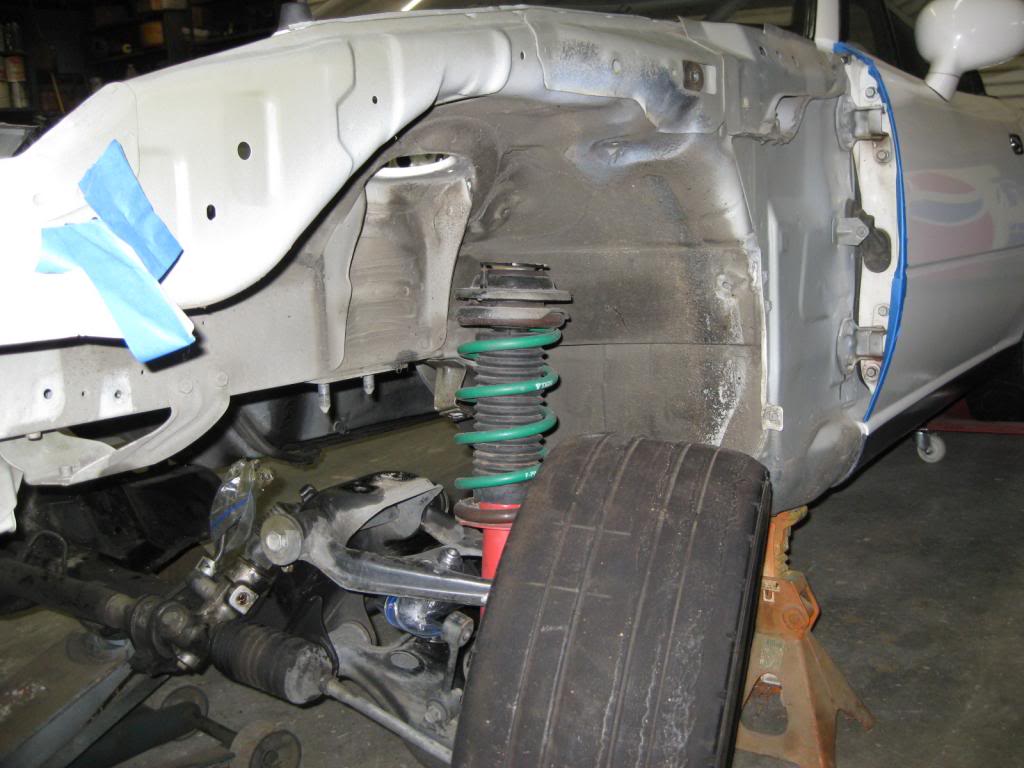
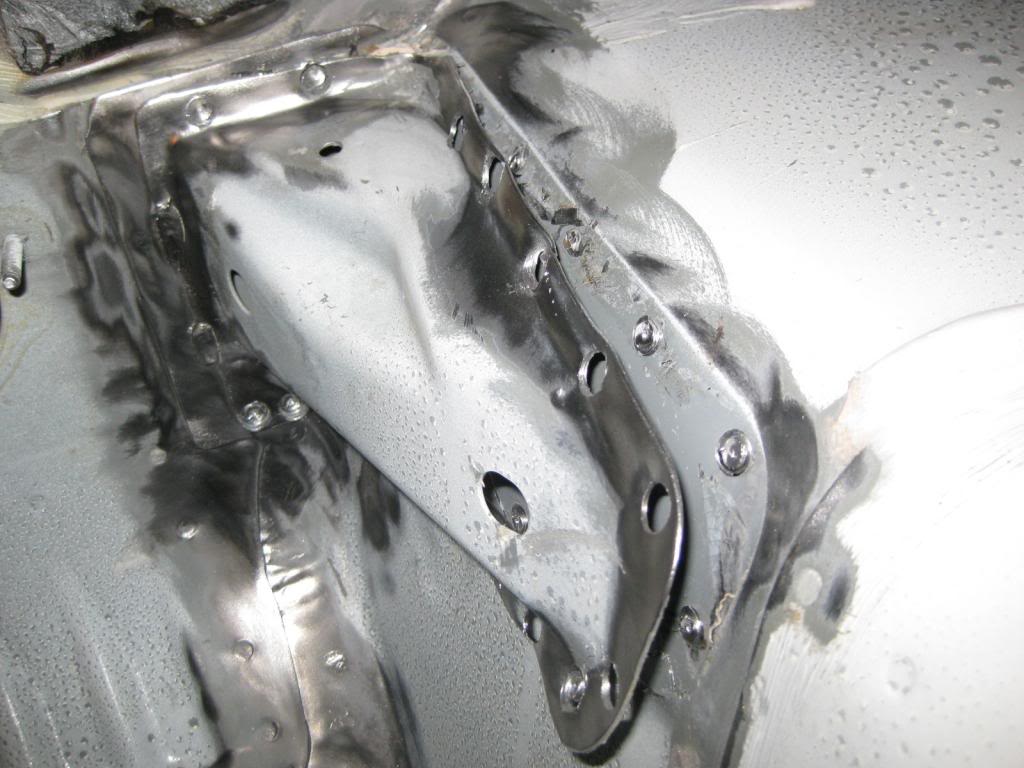
You can see where the FM st/steel rails and butterfly brace was bolted in with the tell-tale signs of my undercoating around the fasteners...
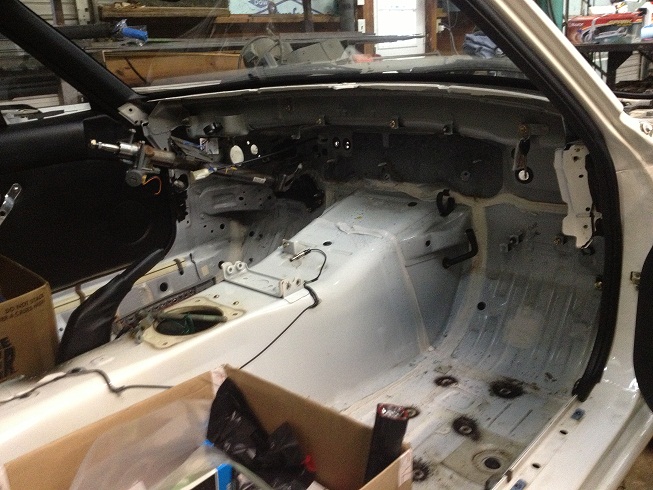
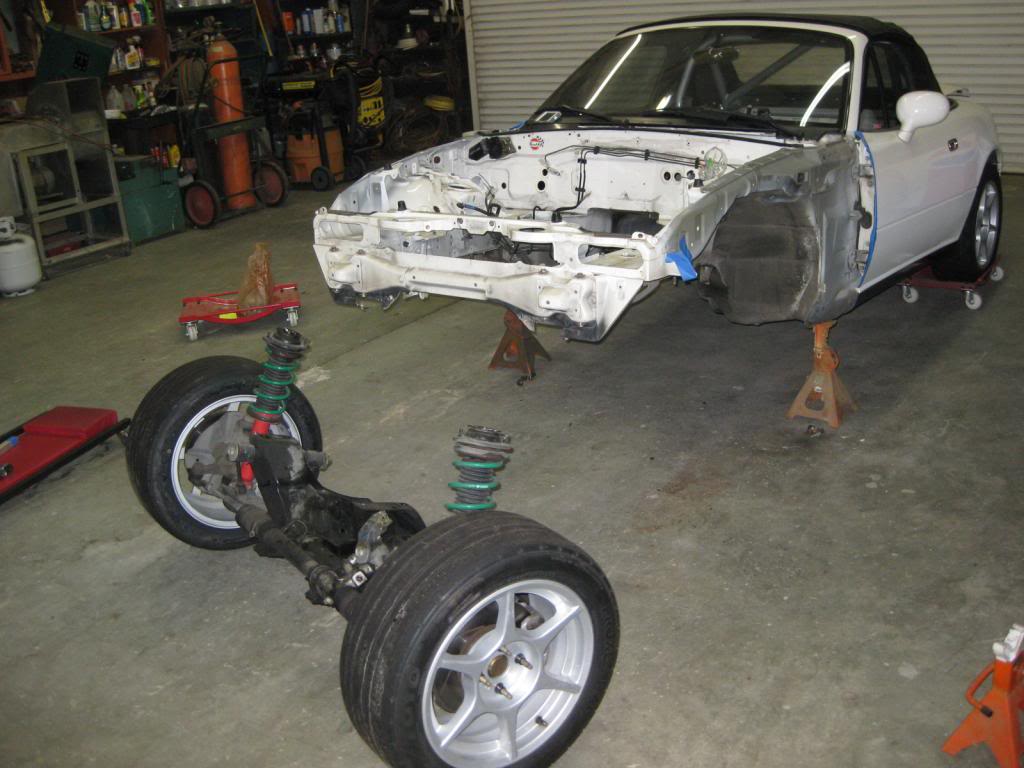
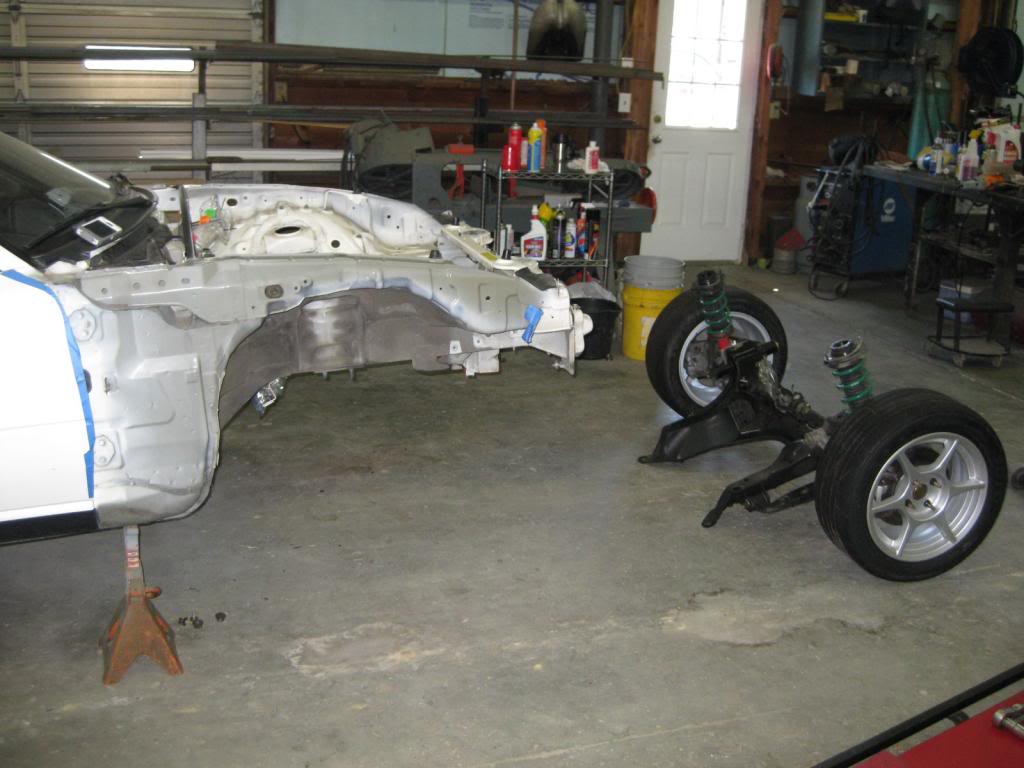
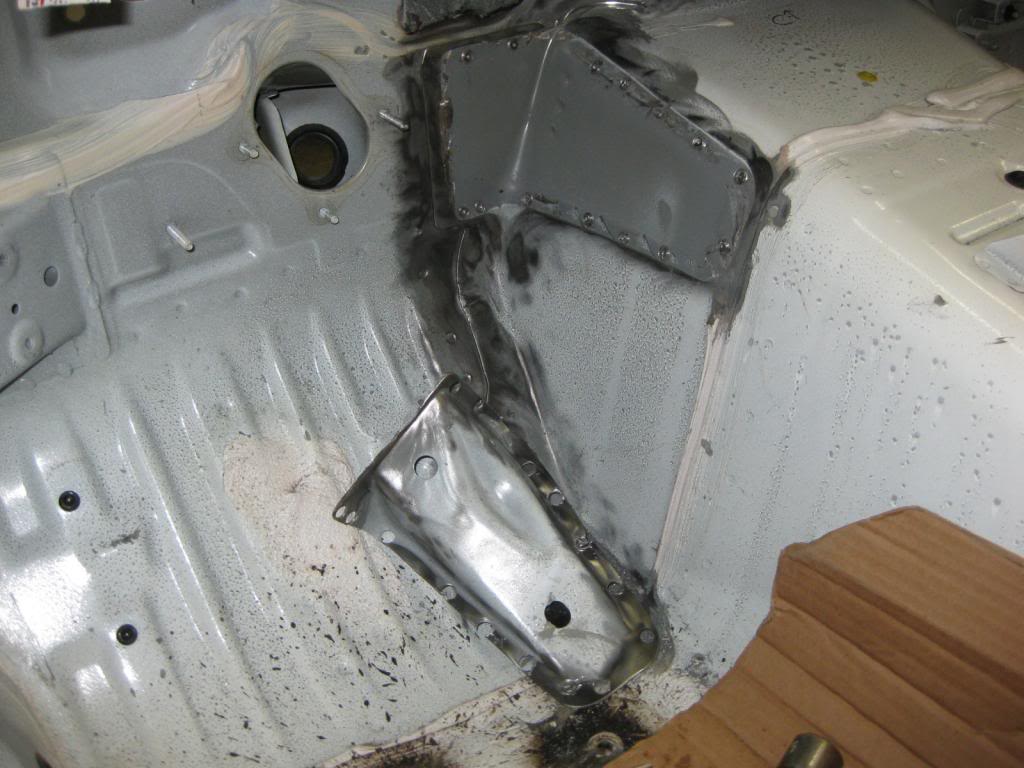
She's about cleaned out now...
So time to keep dismantling. Empty the engine bay first...
Now, remove about everything inside between the doors... Should have put the dash in with wing nuts since my '90 dash swap took place just last year. Oh well, it's a pretty simple puzzle after you do it once!
You can see where the FM st/steel rails and butterfly brace was bolted in with the tell-tale signs of my undercoating around the fasteners...
She's about cleaned out now...
Last edited by ToySnakePMC; 02-23-2013 at 01:34 AM.
02-23-2013, 01:46 AM
#4
V8 Miata Fanatic
Thread Starter
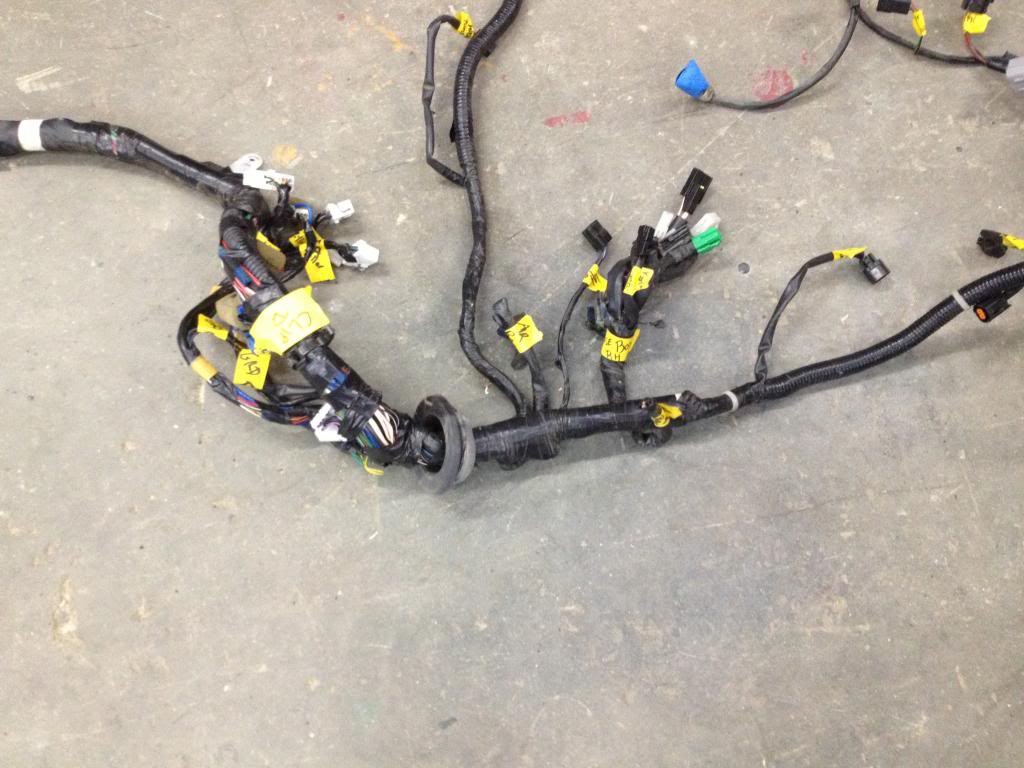
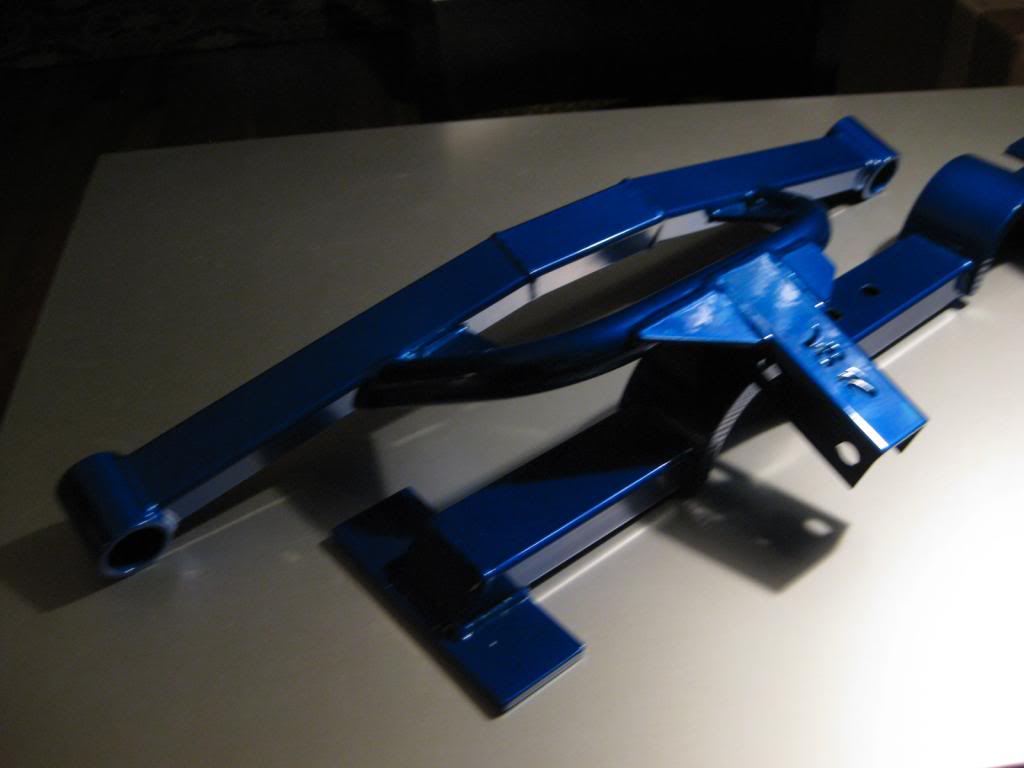
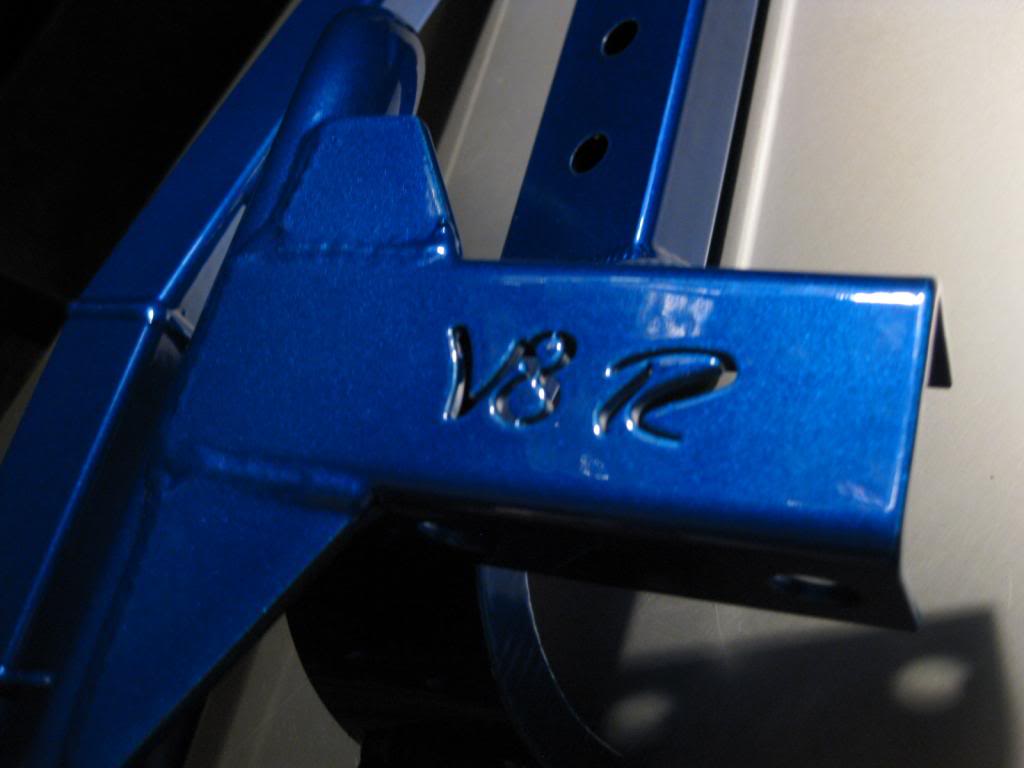
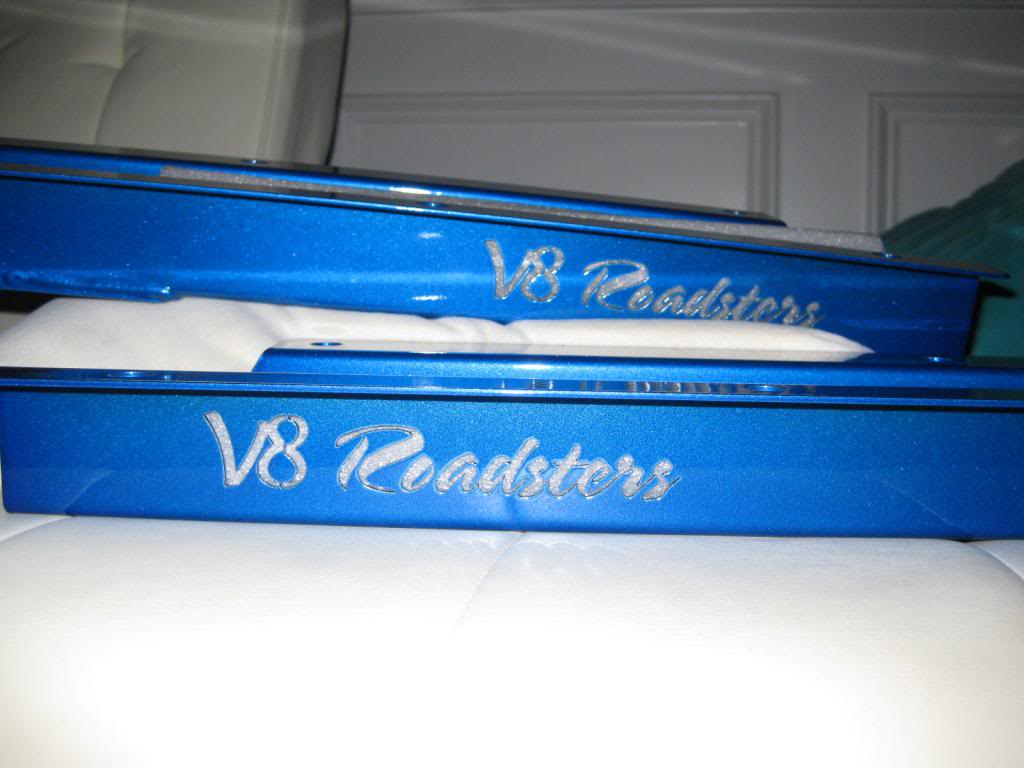
Well... fellas, some good stuff arrived via FedEx this week while I was out of town. I placed an order with Steve at V8Roadsters back in late Dec'12 or so, and received what I hope are the first two boxes of artwork. One box had the front crossmember, tranny x-member, and rear Ford diff brackets, while the 2nd box appears to have the frame rail stiffeners and well-packaged bag of hardware. V8R did right by me with using a blue powdercoat in lieu of standard grayish-black or red. I got more than I bargained for with this gorgeous blue metallic finish! I let them pick the exact color - just send something not red!!
See what ya think?
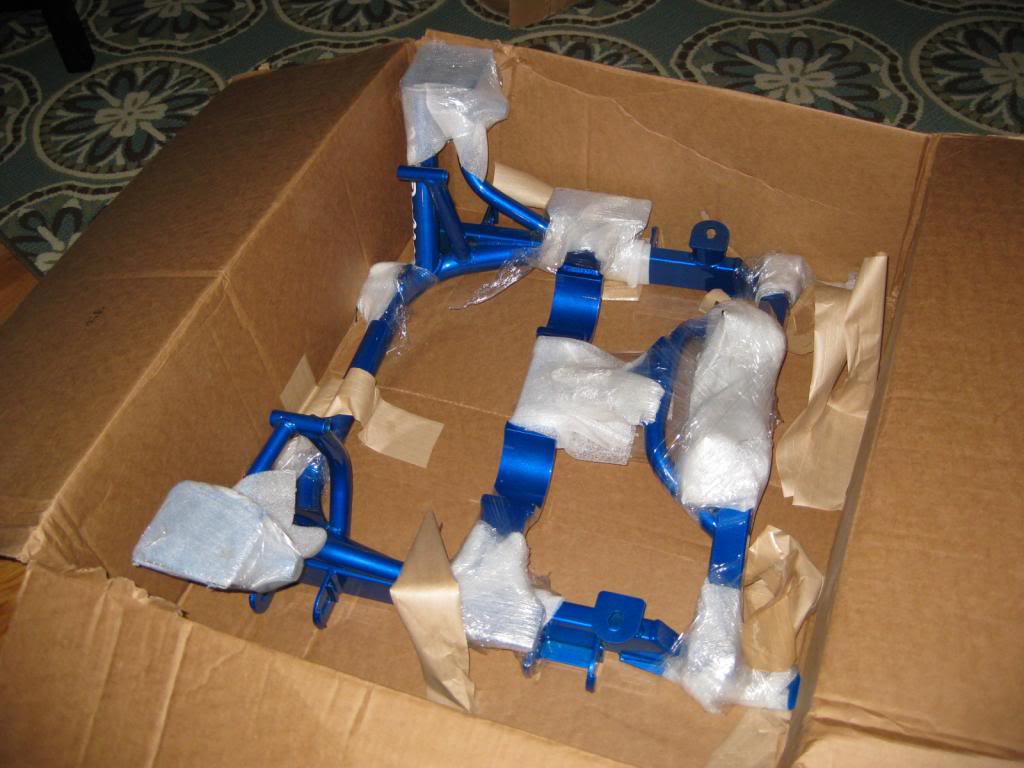
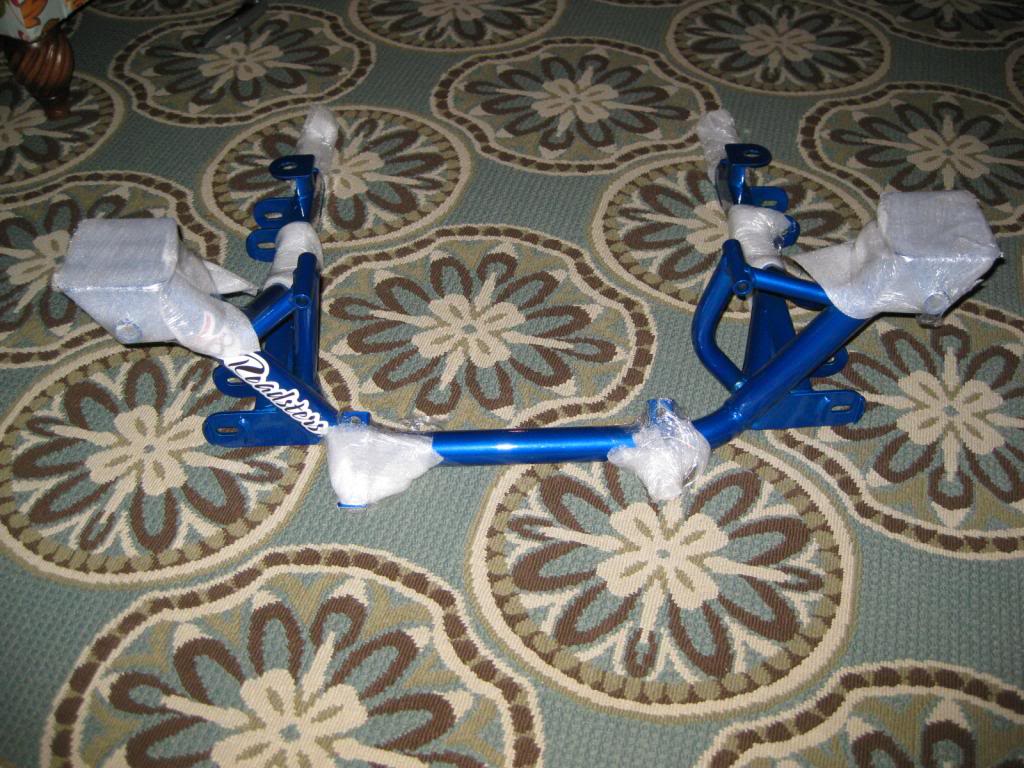
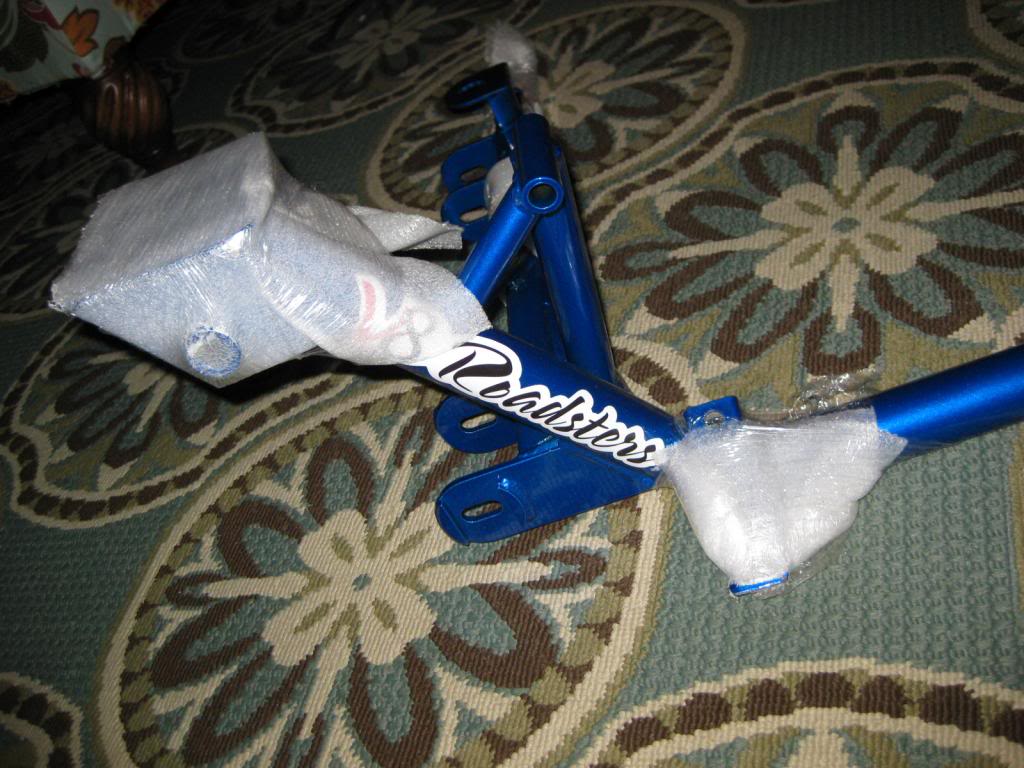

Now, some pics w/o camera flash that may not bleach out the colors:
Poor attempt at artistic shot
See what ya think?
Now, some pics w/o camera flash that may not bleach out the colors:
Poor attempt at artistic shot
02-23-2013, 02:04 AM
#5
V8 Miata Fanatic
Thread Starter
That sort of brings this thread up to the present... I'll need to pick up my 8.8 donor diff (thanks Tad!) that may or may not need rebuilding. Probably will, once I determine the desired ratio for fast car with incoming big (to me) power, and double overdrive tranny... I guess you could gear it for 1500 RPM at 75 if you really wanted to. It should be fun to work thru that and select what's right for me. This won't be a 1/4 mile car, but I do want to be able to easily do 1000 mile weekend runs to Road ATL or Blue Ridge Mtns - as well as - put it thru some HDPE events so I can get a strong sense of how crazy it will be at 50% or better throttle!
Other good stuff coming, you ask? Why yes... Ordered FM radiator, stage 2 fans, fuel kit, FM V8 front sway bar, hyd clutch kit, etc. V8R should be sending out my alum oil pan, alum driveshaft, P/S delete pulley bracket, and a few other awesome items of choice.
Keep you posted. Once I locate engine/ tranny, then it will be time to experiment with a plasma cutter, BFH, and whatever else I can drag up to hit with, heat with, paint with in the shop (not mine - but nearby family's shop, thank goodness!)
I look forward to getting some good advice for wiring and how to work out all the little details. I'll definitely need this forums' help for some future battles to fight. I do read here, m.net, LS1tech, FM, and anything else that looks interesting about these swaps.
Thanks, Pat
 02-23-2013, 03:25 PM
#7
V8 Miata Fanatic
Thread Starter
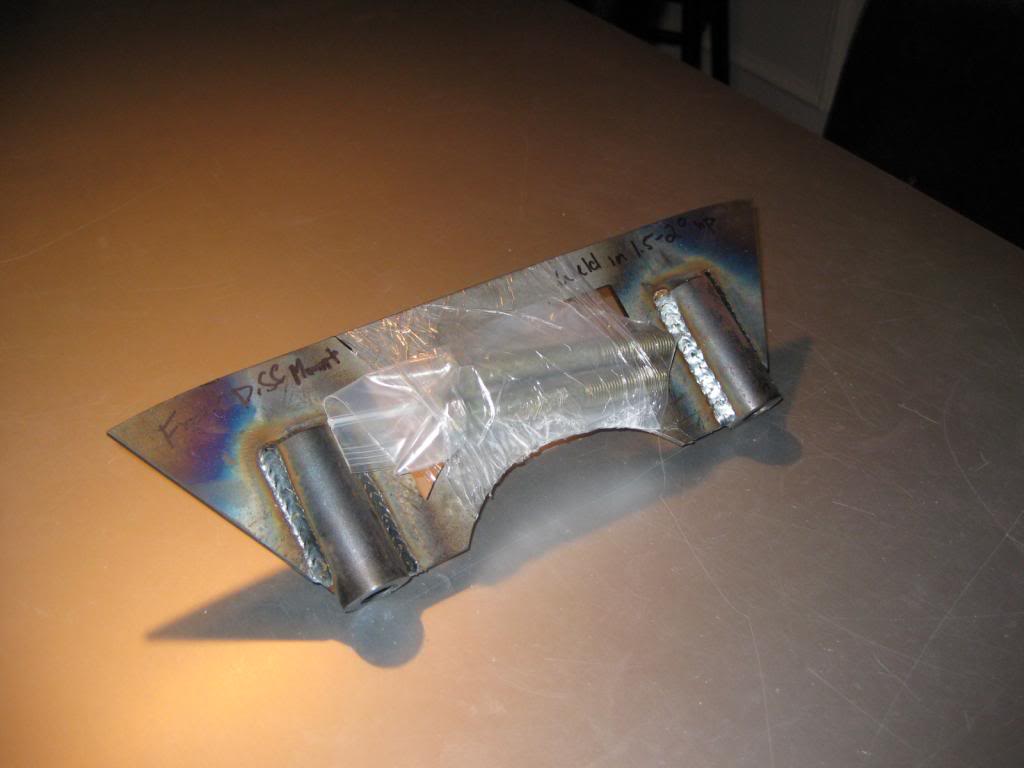
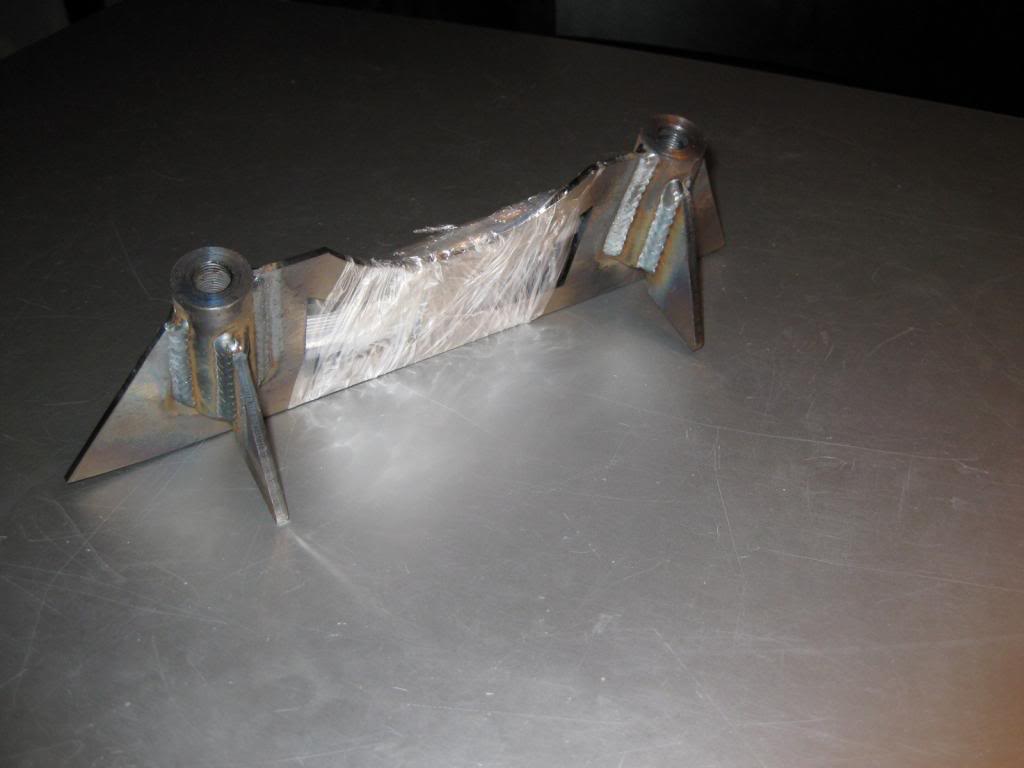
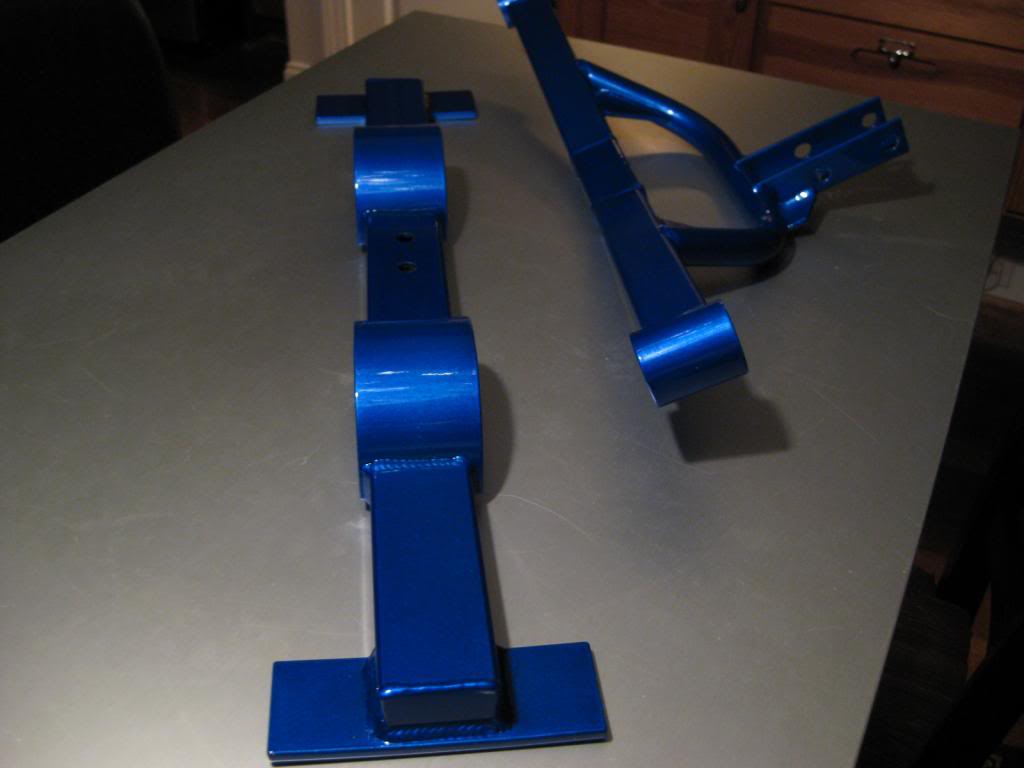
Unwrapped a few more items from the V8R shipment. Frame rail stiffeners, engine mounts, and lots of hardware wrapped with love and tender care!
Quick question: Should my transmission crossmember be drilled out to match up with the welded and drilled out brackets on the frame rail stiffeners? Not certain, myself. But I could see an argument that would suggest it's best to let the customer drill the holes once he perfects the driveline alignment... Any V8R customers, please share. Thanks

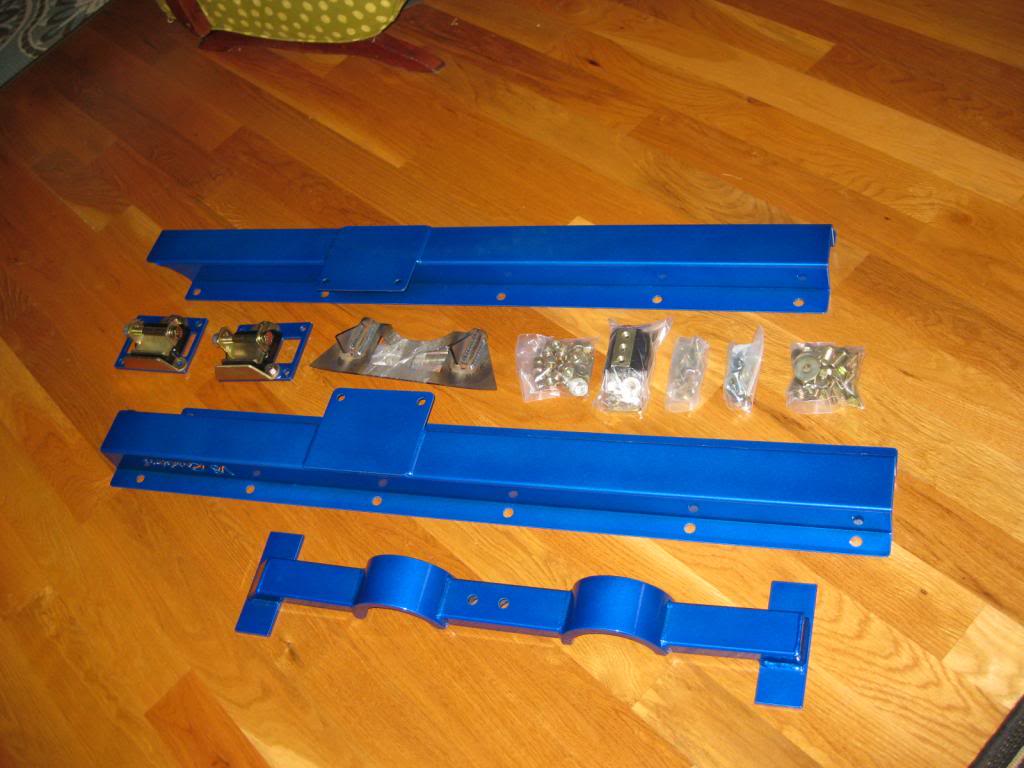
Quick question: Should my transmission crossmember be drilled out to match up with the welded and drilled out brackets on the frame rail stiffeners? Not certain, myself. But I could see an argument that would suggest it's best to let the customer drill the holes once he perfects the driveline alignment... Any V8R customers, please share. Thanks
02-23-2013, 06:16 PM
#8
V8 Miata Noob

Join Date: Feb 2013
Posts: 5
Likes: 0
Received 0 Likes
on
0 Posts
02-26-2013, 09:37 AM
#9
V8 Miata Noob

Join Date: Dec 2009
Posts: 6
Likes: 0
Received 0 Likes
on
0 Posts
When you get your V8R oil pan, please compare its dimensions to these for us (especially the front bit over the steering rack).
http://www.mastmotorsports.com/2010/..._pan_views.pdf
http://www.holley.com/data/products/...dimensions.jpg
Autokraft.org | Autokraft Race Cars and Restorations | Eau Claire, WI
http://www.mastmotorsports.com/2010/..._pan_views.pdf
http://www.holley.com/data/products/...dimensions.jpg
Autokraft.org | Autokraft Race Cars and Restorations | Eau Claire, WI
02-27-2013, 09:07 PM
#10
V8 Miata Fanatic
Thread Starter
I certainly will since I don't have a LSx or tranny to play with as of yet. I'll document as much as I can about the pan and other components from V8Roadsters and FM. Neither website gives a LOT of info on the radiators, engine oil pans, fuel line/ filter kits, etc. I'll do what I can to help keep our group informed! Thanks, Pat
02-27-2013, 09:25 PM
#11
Jim Stainer

When you get your V8R oil pan, please compare its dimensions to these for us (especially the front bit over the steering rack).
http://www.mastmotorsports.com/2010/..._pan_views.pdf
http://www.holley.com/data/products/...dimensions.jpg
Autokraft.org- |- Autokraft Race Cars and Restorations- |- Eau Claire, WI
http://www.mastmotorsports.com/2010/..._pan_views.pdf
http://www.holley.com/data/products/...dimensions.jpg
Autokraft.org- |- Autokraft Race Cars and Restorations- |- Eau Claire, WI
02-28-2013, 08:32 PM
#12
V8 Miata Fanatic
Thread Starter
Another week of travel for my job & came home to open 2 boxes from my over-worked UPS delivery guy. Found this Z06 / LS7 intake on eBay - said to have 1100 miles on unit and filter & it looks brand new!
This is the 2nd LS swap book I've purchased - and at first glance, it looks to be pretty in-depth on ignition/ wiring/ fuel/ clutch/ troubleshooting/ etc. I'm not a LSx expert, so I need all the expert guidance I can gather.
V8R reports that driveshaft and other goodies will head my way in near future. Just gotta keep an eye out for my engine/tranny pull-out. Could be a while now that I've just started being concerned about possibly getting "stuck" with Hurricane Sandy wet-car components. Thats kinda scary...
03-10-2013, 06:14 PM
#13
V8 Miata Fanatic
Thread Starter
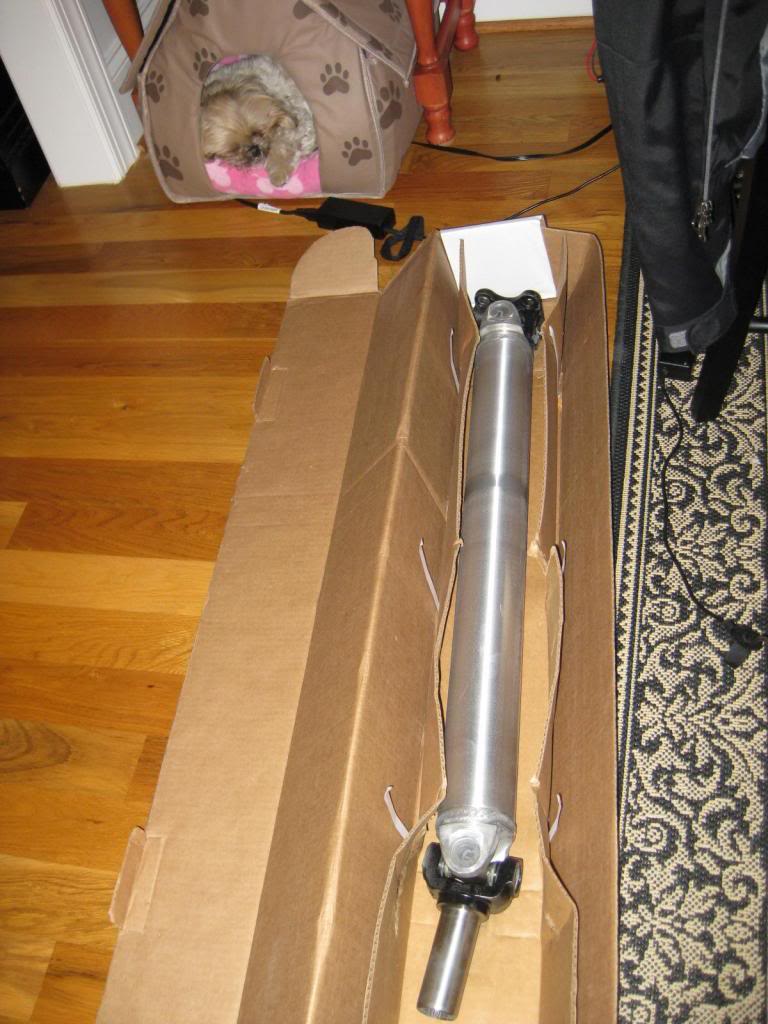
A few weeks have passed since I've gotten to the shop to play. In the meantime, a V8R alum driveshaft arrived and will be garage art until there's a need - and a place - to bolt it in! Oh well, gotta start stockpiling parts sooner or later. Looks like Nikki, our 1 yr-old fur baby, has about as much interest in it as the wifey.
Anyway, I was able to swing by Home Depot and get a new 4" wire brush for the angle grinder before removing the 8 nuts holding the ft subframe, K member, in place. This car has had an easy life with no salt or much rainy day driving - all 8 came loose with no penetrating oil and a 1/2" ratchet - almost too easy. (Think I'll torque my V8R subframe a bit tighter...)
Took some 6" porch decking and slid it thru the openings on the front dollies, added scrap 2x6x14"'s & cut and screwed onto the decking boards, and then secured some large 6"x8" or so blocks to support the front end and allow it to roll as needed (since I keep the car to the side and don't tie up my father-in-law's shop in case he needs to use the building.
Now - had the pleasure of grinding off the seam sealer around the trans tunnel and the two supports/ gussets that will need to be carefully removed for widening. Gotta get a spot-weld specific drill bit from Harbor Frt before I do any surgery. That's it for today. Keep searching for engine and tranny...
03-15-2013, 09:48 PM
#14
V8 Miata Fanatic
Thread Starter
Time to update - couple of things have taken place this week.
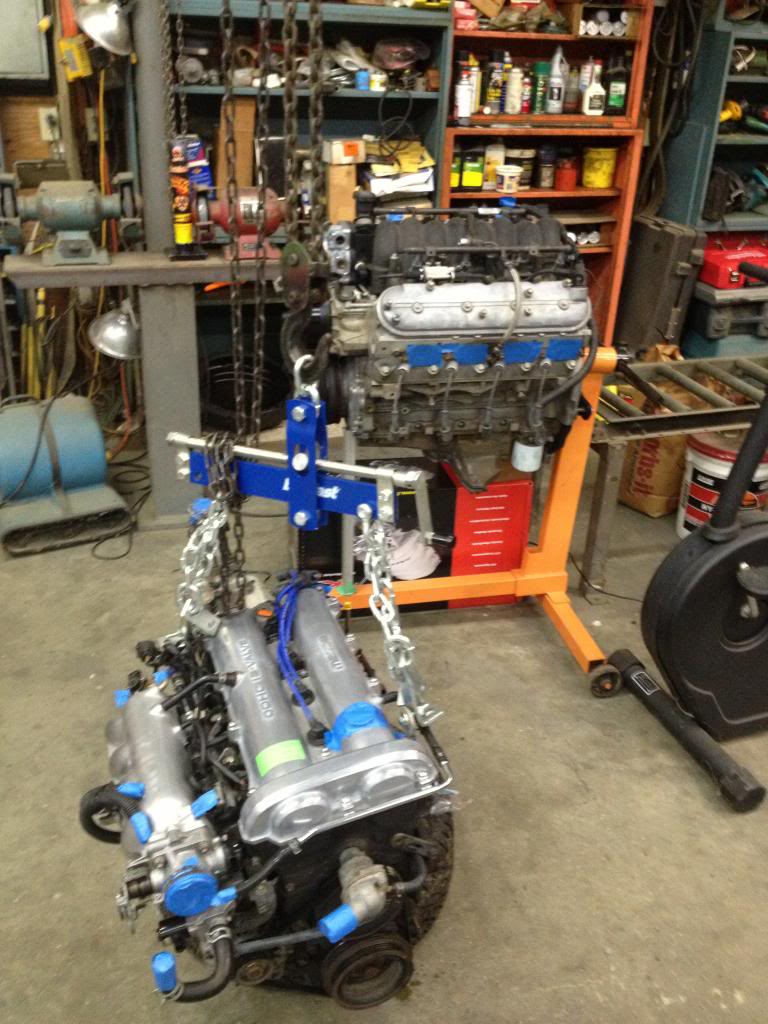
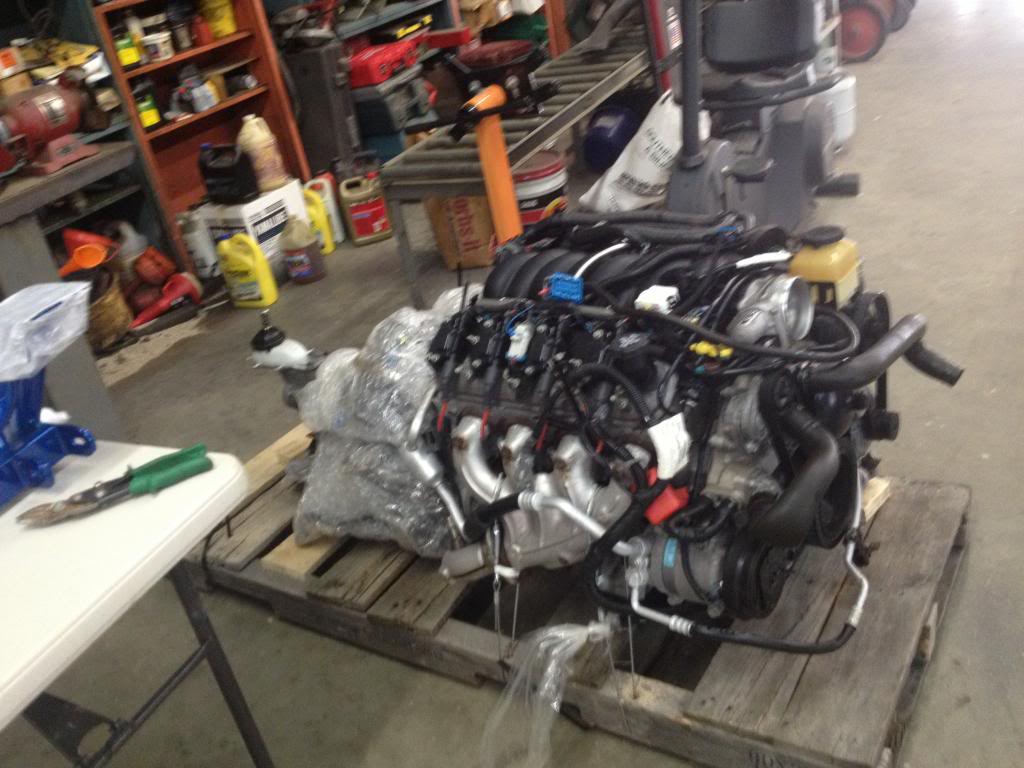
#1 was the discovery on Monday that a LS2-T56 that I had been watching for weeks (among several other LS1's and 2's...) was offered at a reduced Buy It Now price sometime that day. I called to confirm that it was still avail and jumped on it. So today when I returned home, I picked it up at the local ABF shipping terminal and brought it to the shop via trailer. My father went along for the ride and seemed pretty pleased with how this thing looked. Hope it will run as well as it looks sitting on the pallet!
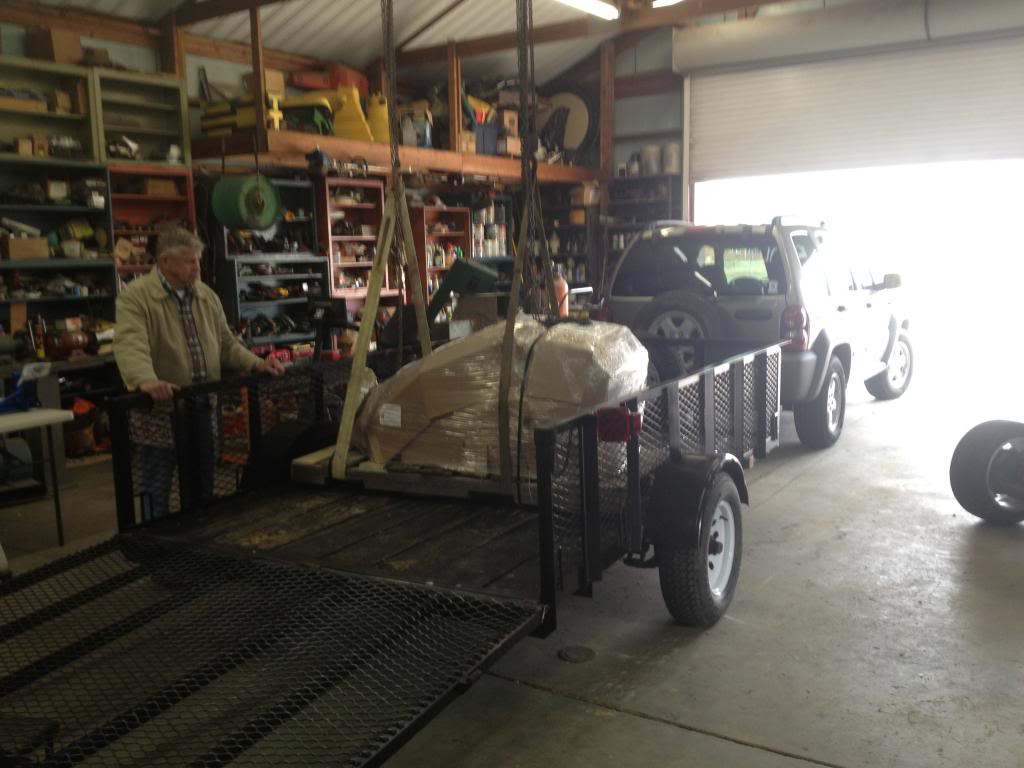
Pulled it under the I beam and used two chain hoists and large tow straps to raise it up and drive the trailer out from under the motor.
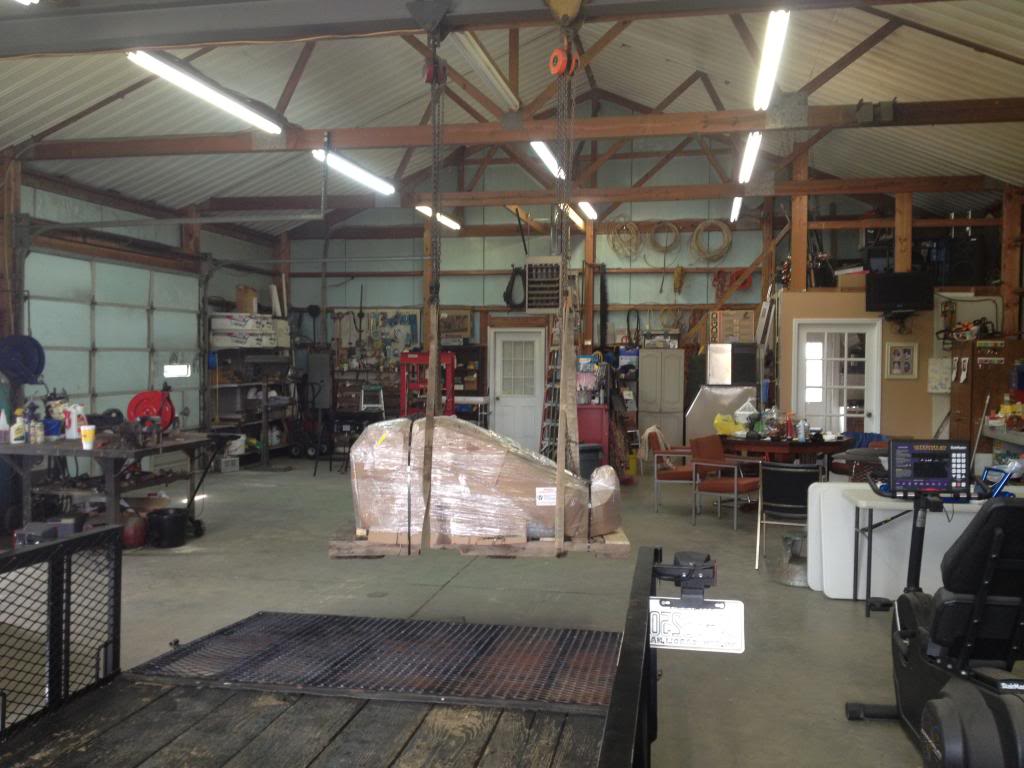
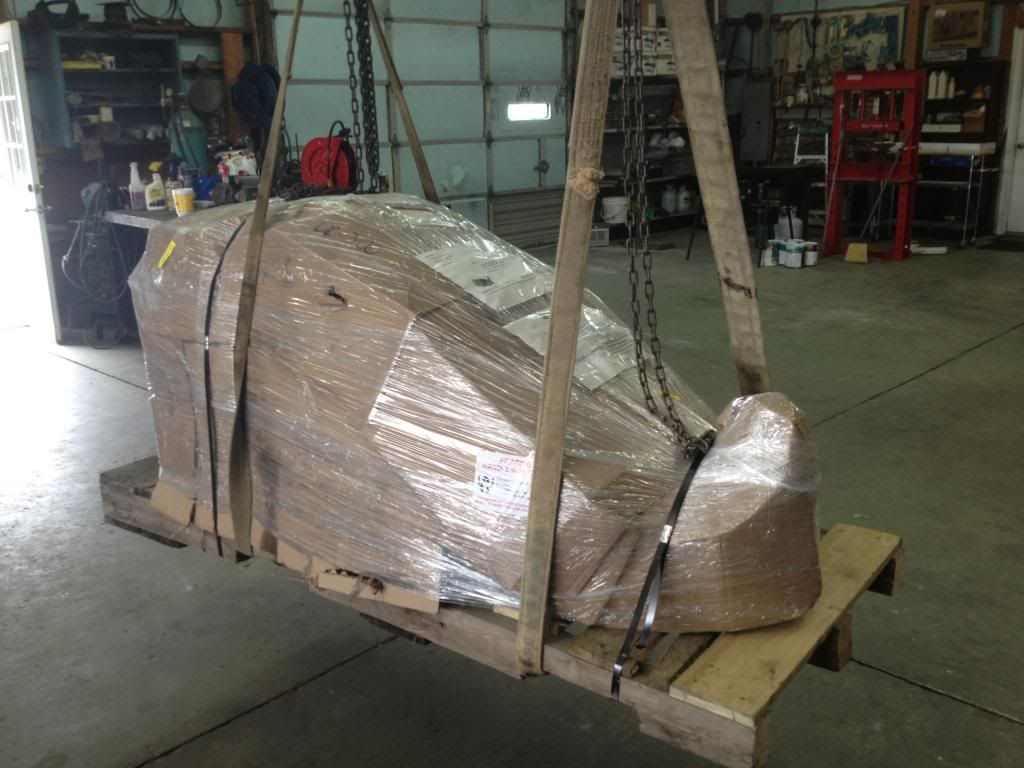
Is this thing wrapped up or what? They used metal straps to stay snug on the shrink wrap & cardboard cover.

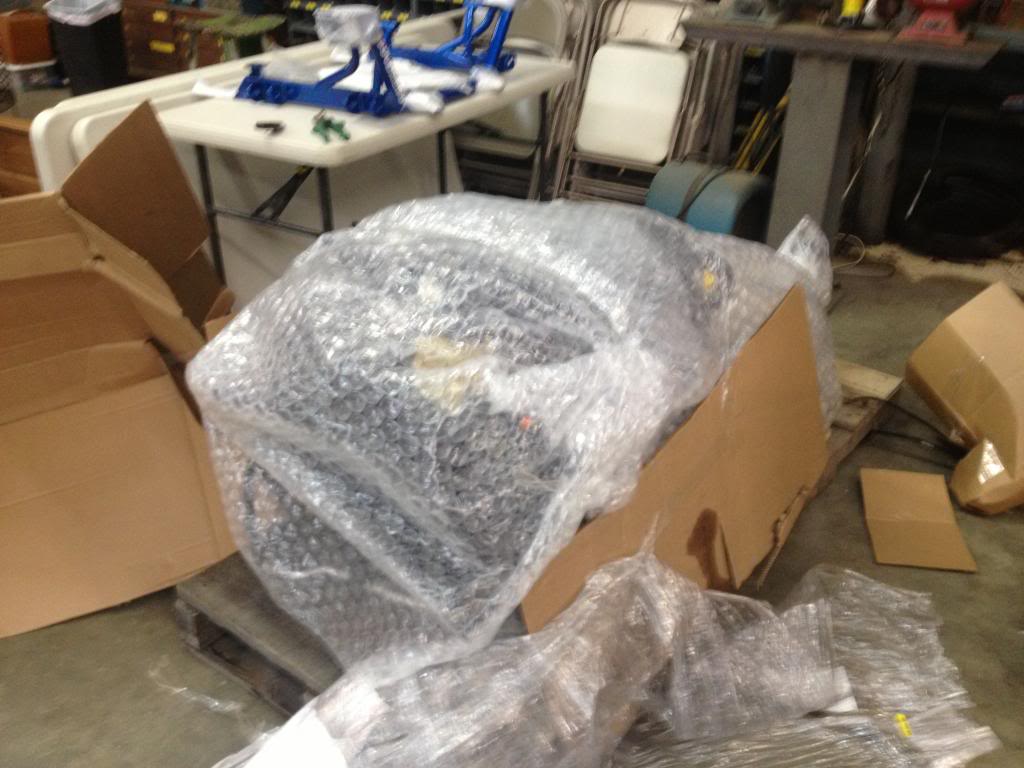
Unwrapping this puppy -- all is looking good so far...
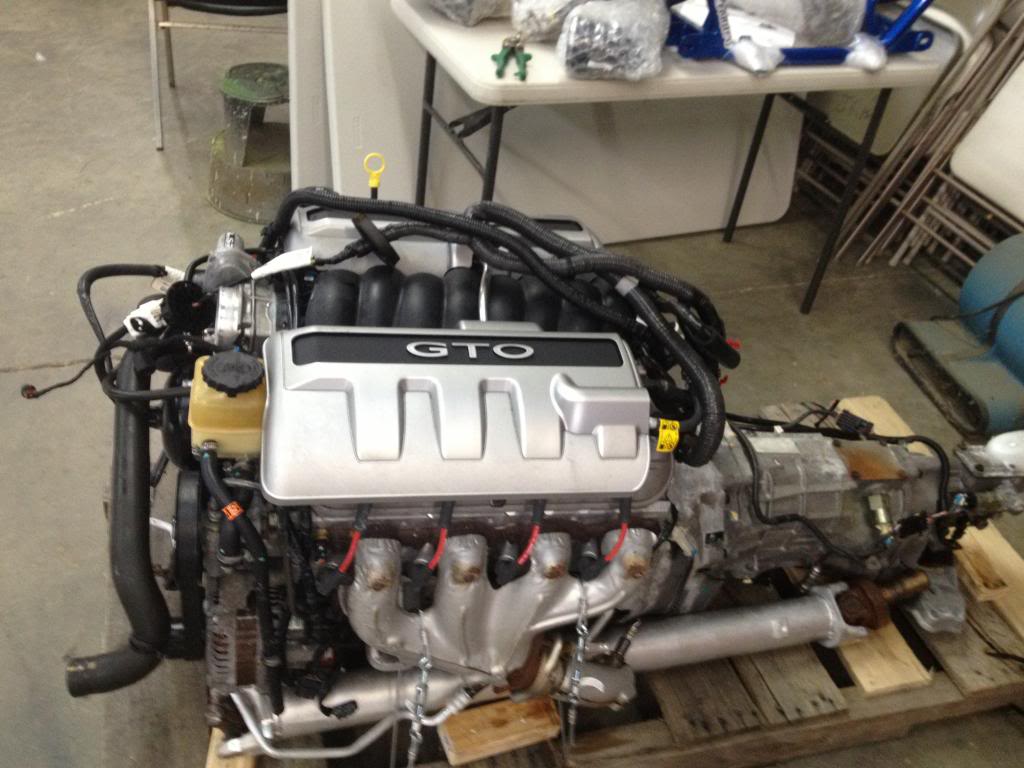
Finally, got the bubble wrap off and snapped on the icing for this cupcake - the GTO coil covers. This thing looks mean. BTW, it's out of a 2005 with less than 19K, has all 3 pedals included, ECM, wiring, and all engine accessories. F Parts / Contemporary Corvettes in Bristol, PA looks like they take a lot of pride in what they sell. Engine was VERY secure on the pallet and everything was protected well with good labeling on the package to help prevent damage during transit. Sweet.
#1 was the discovery on Monday that a LS2-T56 that I had been watching for weeks (among several other LS1's and 2's...) was offered at a reduced Buy It Now price sometime that day. I called to confirm that it was still avail and jumped on it. So today when I returned home, I picked it up at the local ABF shipping terminal and brought it to the shop via trailer. My father went along for the ride and seemed pretty pleased with how this thing looked. Hope it will run as well as it looks sitting on the pallet!
Pulled it under the I beam and used two chain hoists and large tow straps to raise it up and drive the trailer out from under the motor.
Is this thing wrapped up or what? They used metal straps to stay snug on the shrink wrap & cardboard cover.
Unwrapping this puppy -- all is looking good so far...
Finally, got the bubble wrap off and snapped on the icing for this cupcake - the GTO coil covers. This thing looks mean. BTW, it's out of a 2005 with less than 19K, has all 3 pedals included, ECM, wiring, and all engine accessories. F Parts / Contemporary Corvettes in Bristol, PA looks like they take a lot of pride in what they sell. Engine was VERY secure on the pallet and everything was protected well with good labeling on the package to help prevent damage during transit. Sweet.
03-15-2013, 09:55 PM
#15
V8 Miata Fanatic
Thread Starter
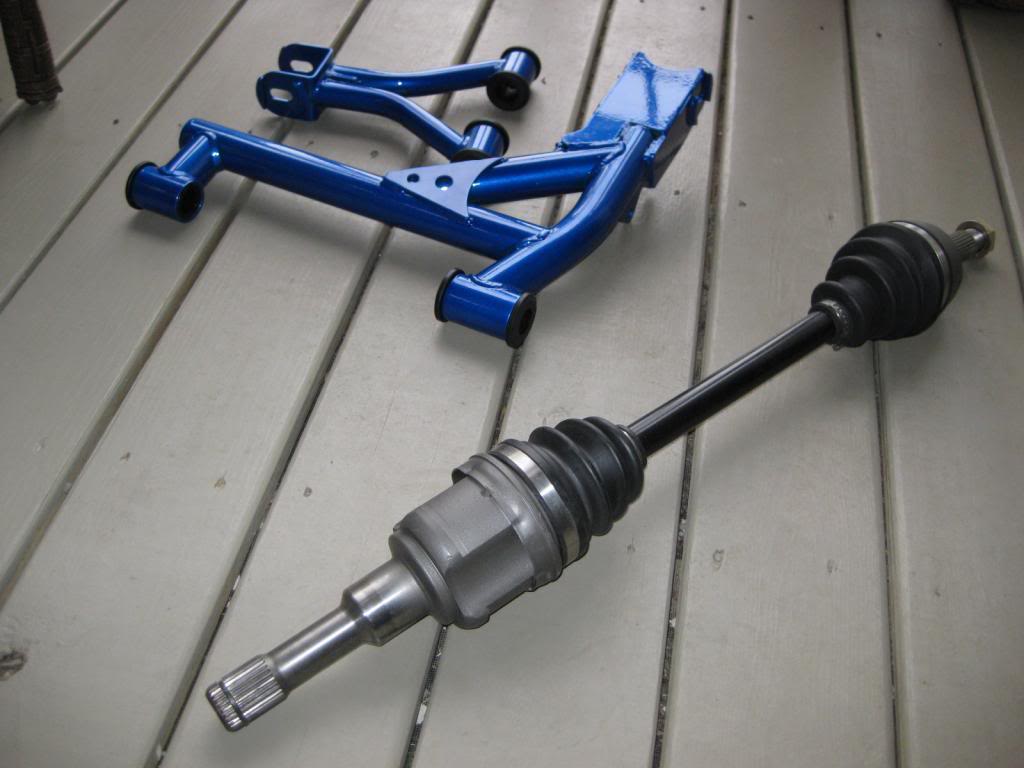
And sometimes good things come in smaller packages... The brown truck delivered a few boxes from V8R -- The stage 1 axles for the yet to be picked up Ford 8.8 diff and a heavy @ss box with 8 tubular control arms.
Took a quick pick with the only unwrapped items - might as well keep the stuff boxed up till I need it, I guess.
Now, just need the V8R oil pan so I can actually bolt somethin' together and put the front crossmember/ K member under the motor. ...Floorboard and firewall cutting will soon commence.
Took a quick pick with the only unwrapped items - might as well keep the stuff boxed up till I need it, I guess.
Now, just need the V8R oil pan so I can actually bolt somethin' together and put the front crossmember/ K member under the motor. ...Floorboard and firewall cutting will soon commence.
03-17-2013, 07:36 AM
#17
V8 Miata Fanatic
Thread Starter
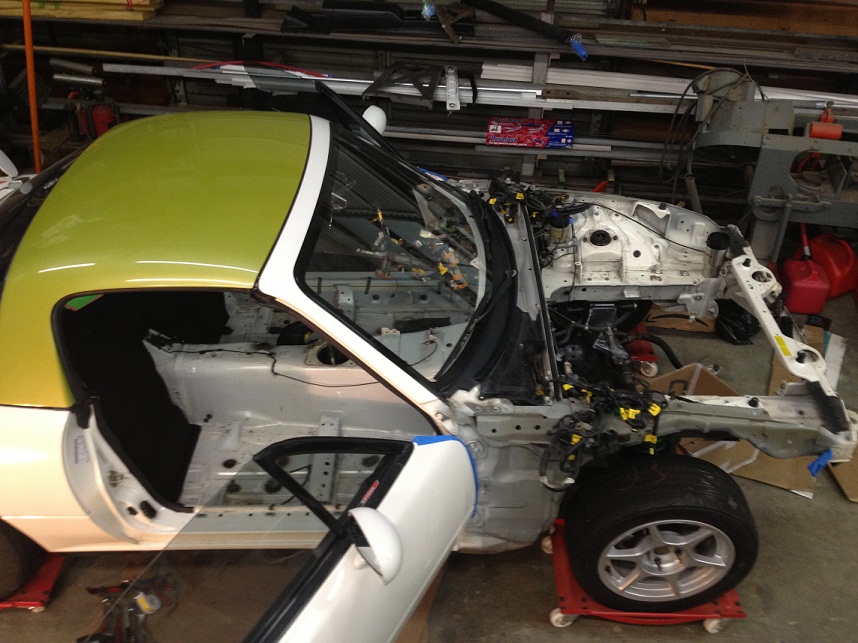
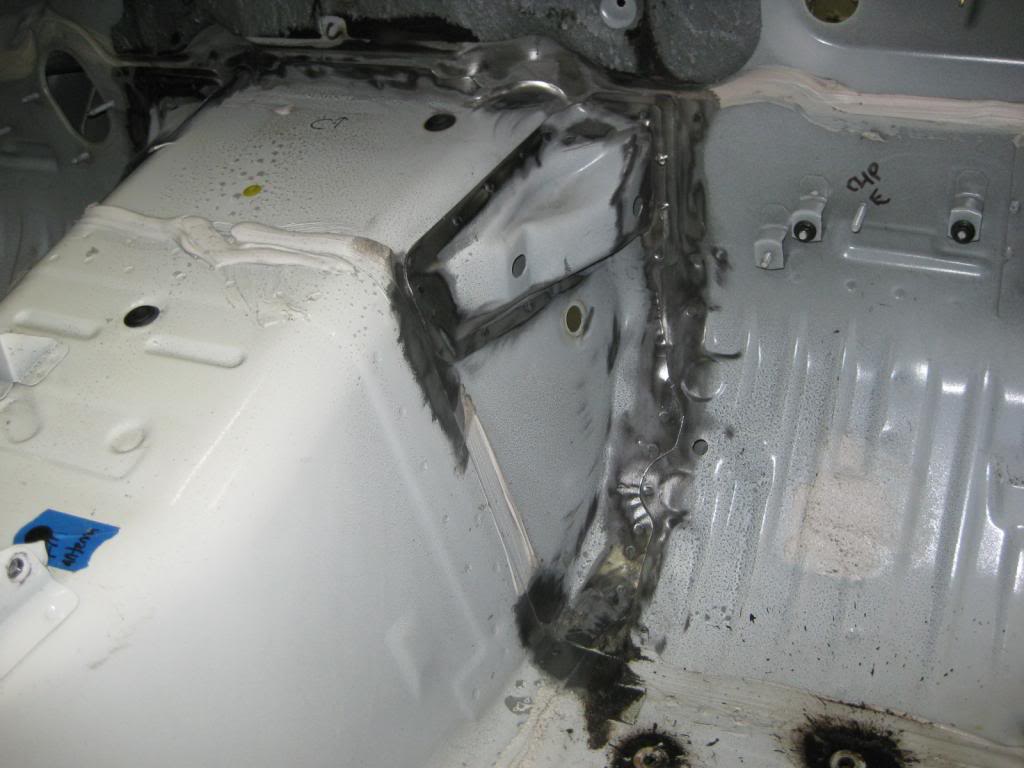
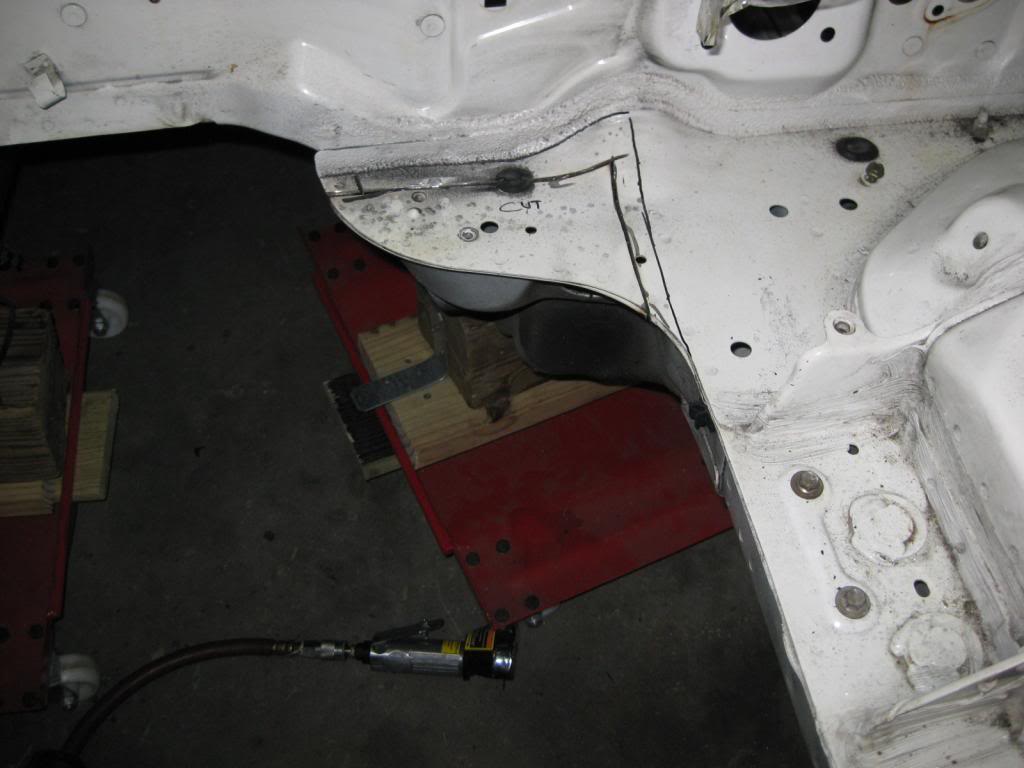
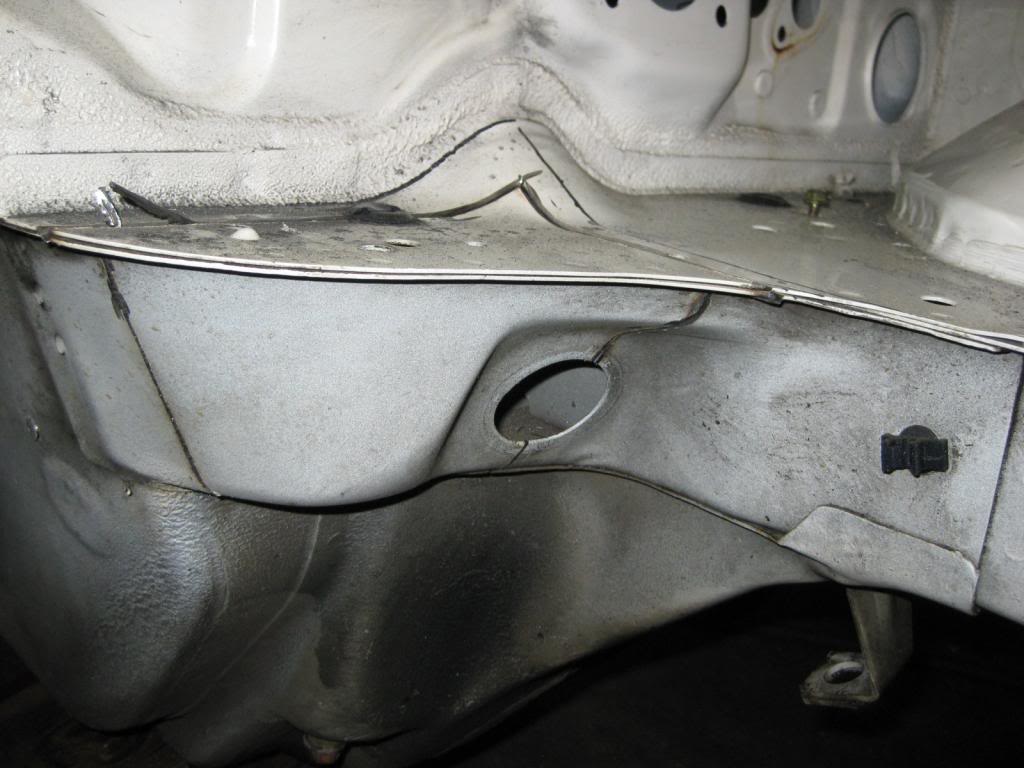
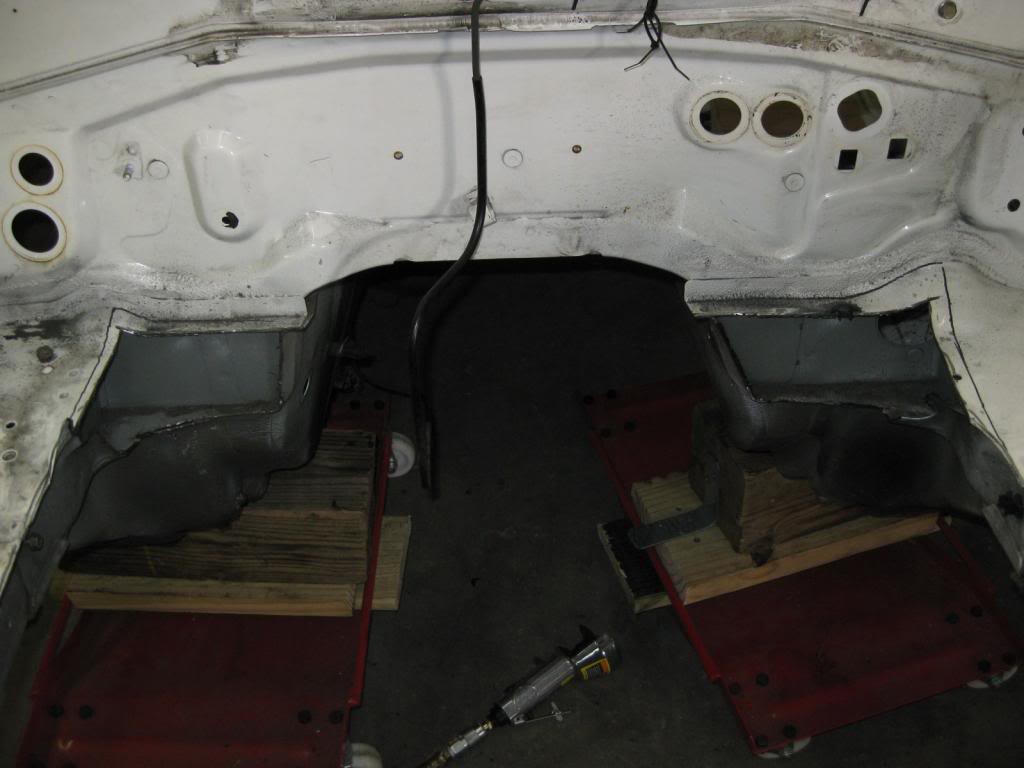
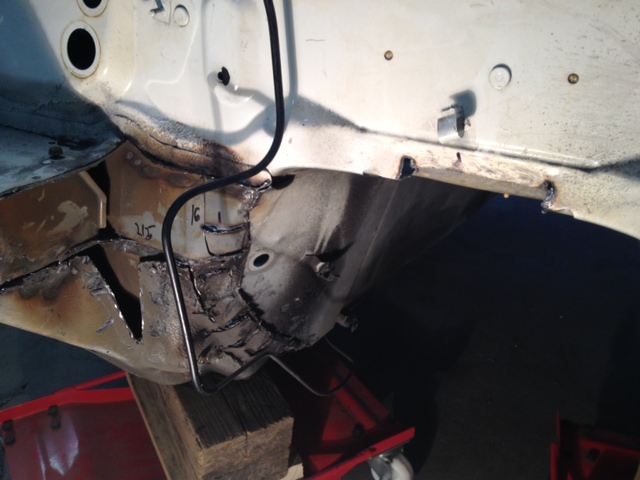
Well, I want to post shots of the early stage of my destruction. I had always wanted some detailed shots of how the transmission tunnel reinforcements get removed with what tools, so after my trip to Harbor Frt Tools to pick up the spot weld drill bit, I'm ready to show you what's involved:
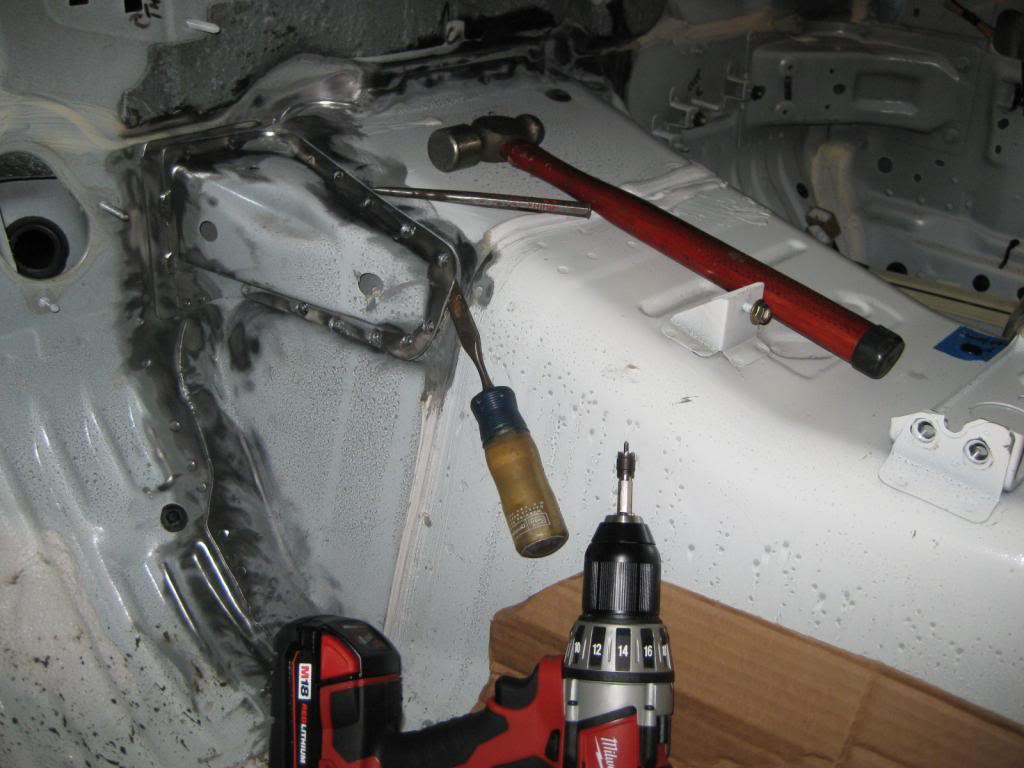
The above hand tools are all that I needed up to this point: small chisel, hammer, drill with bit, and a center punch.
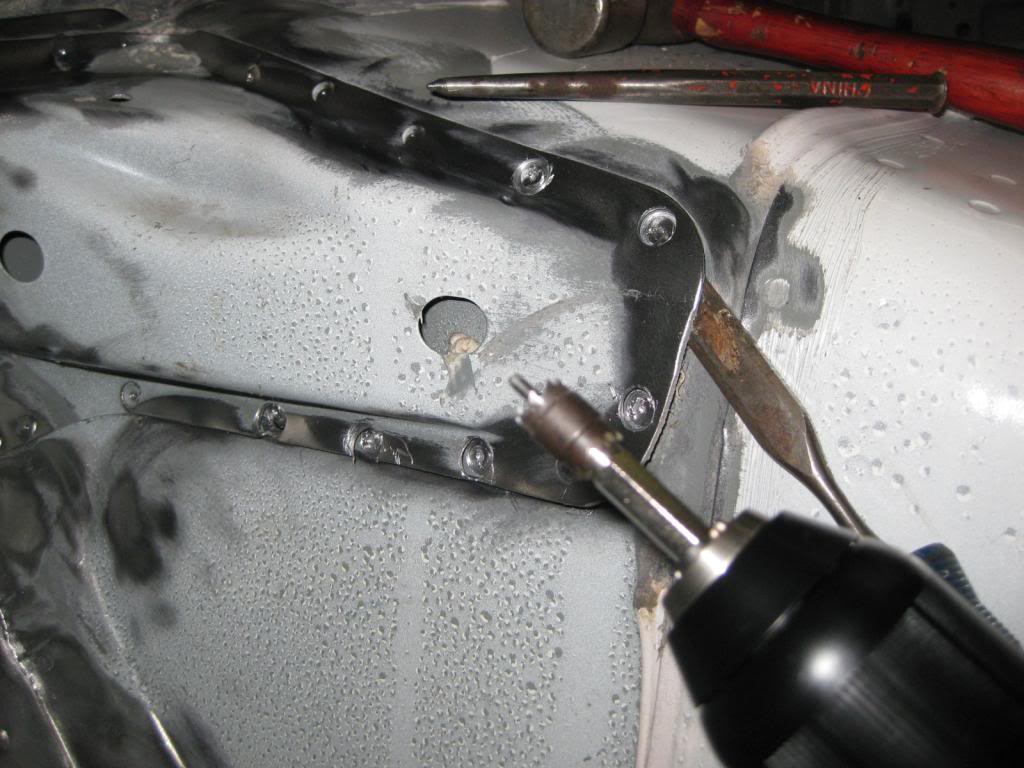
She's coming apart now. You don't have to drill too deep to break through the weld. I think the best way to go is to drill your first 3 or 4, then use the chisel and hammer to test to see if you can separate the panels.
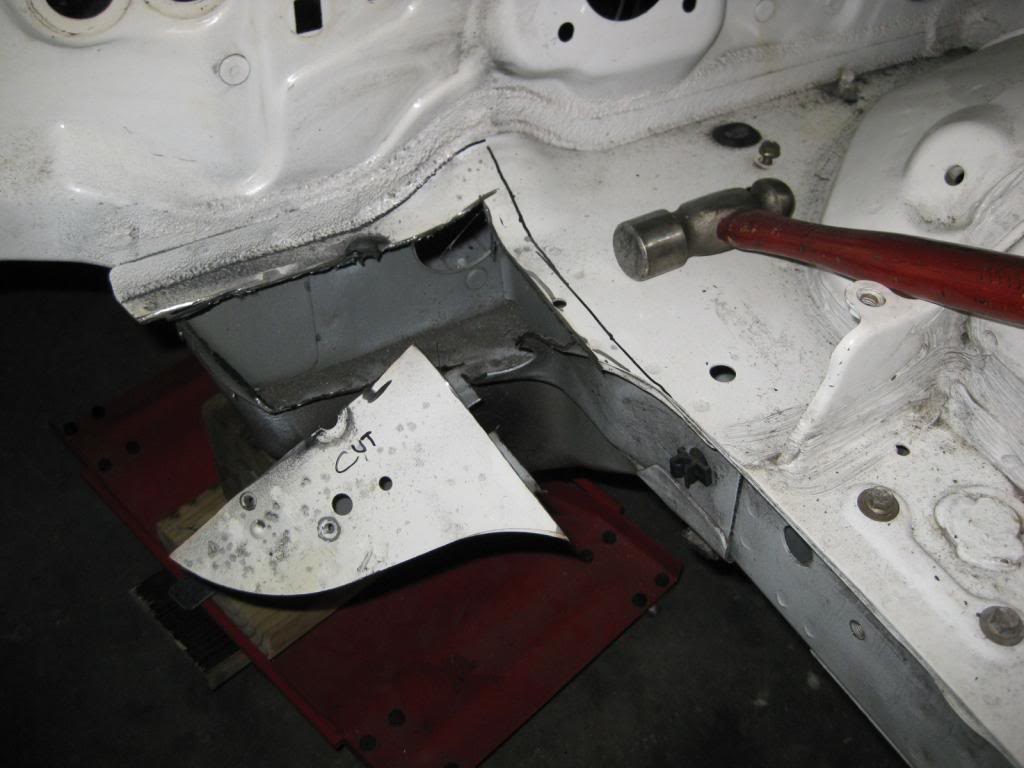
Now, I used my $9.98 Harbor Frt Tools 3" hi-speed air cut off tool to cut through the two welds near the throttle pedal. ...success.
 03-17-2013, 07:57 PM
#18
V8 Miata Fanatic
Thread Starter
Short wrap up for the wknd -- removed the RH side transmission tunnel brace (just like the LH one above) and decided to fire up the $9.98 cut-off tool and do some preliminary cuts near the firewall. Hopefully next week, my brother will swing by from VA and show me how to use his plasma cutter to do the final cutting on the firewall and trans tunnel. I'm very excited about that happening.
Today, I ordered the CTS/ C6 waterpump and crank pully... from Amazon. New waterpump with excellent, but limited, feedback was $108 shipped. New AC Delco pully was about $87 with frt included - also a fair deal I think. I do plan to put together a ------ sheet for possible public viewing like GoKart's. I think it helps others figure out if the LS swap is realistic before making the plunge. I do think it can be done cheaper than how mine is heading, but I plan to keep this V8 Miata for many years to come so I'm not cutting any corners on this build. ...Now, maybe the 2nd build will be different... Wouldn't that be fun.
to do the final cutting on the firewall and trans tunnel. I'm very excited about that happening.Today, I ordered the CTS/ C6 waterpump and crank pully... from Amazon. New waterpump with excellent, but limited, feedback was $108 shipped. New AC Delco pully was about $87 with frt included - also a fair deal I think. I do plan to put together a ------ sheet for possible public viewing like GoKart's. I think it helps others figure out if the LS swap is realistic before making the plunge. I do think it can be done cheaper than how mine is heading, but I plan to keep this V8 Miata for many years to come so I'm not cutting any corners on this build. ...Now, maybe the 2nd build will be different... Wouldn't that be fun.
Last edited by ToySnakePMC; 03-17-2013 at 07:59 PM.
03-24-2013, 09:14 PM
#19
V8 Miata Fanatic
Thread Starter
Gotta share the latest with you -- saw the wonders of a plasma cutter on 220V do its stuff. It slices any and everything like butter - especially 1 or two layers of Mazda sheet metal. All these pics focus on the RH side of the transmission tunnel to keep this simple. If you need any equivalent LH side photos, please PM me.
Brother from VA made this happen - thanks HOLT !! Now, get busy!
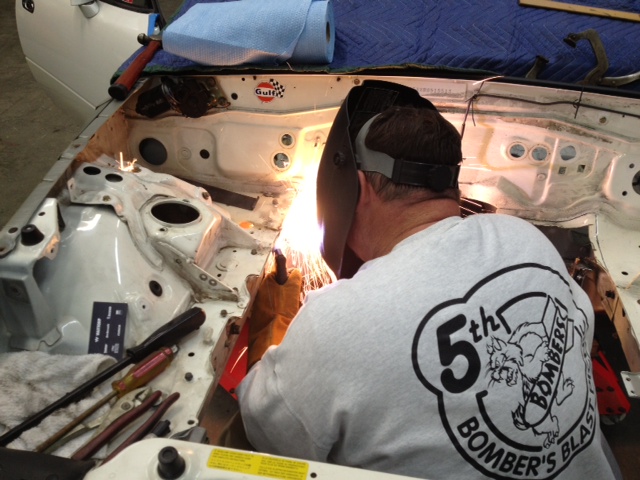
Clean work - just the somewhat rough plasma edges left behind - will tidy up later. Notice the FM instructions page displayed -- gotta follow directions!!!
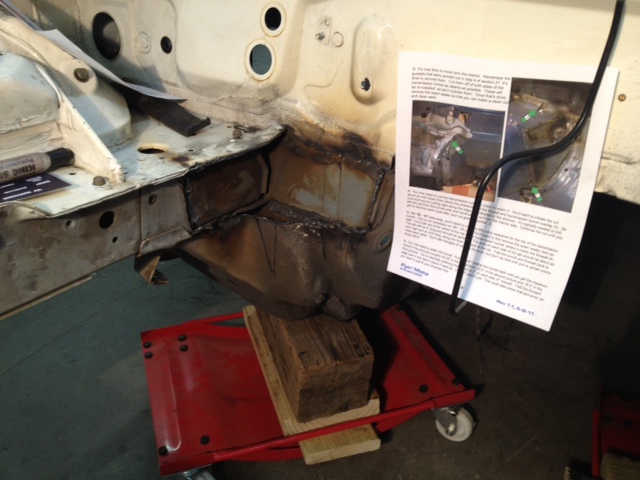
Cut a "V" so this whole back corner can be flattened out for upcoming fuel line routing and to comply with FM's build statement "the general idea is to make the engine bay a square box." Well said.
Made the initial, vertical plasma cut for widening the tunnel at the top from the engine bay. Holt did the remaining 95% from inside the car.

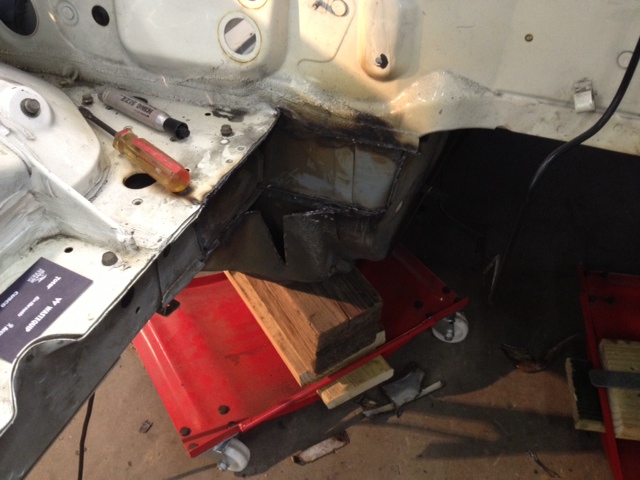
Next, we cut about 2" horizontal tabs every 2" or so to allow for easy folding. Did those from inside the car as well.
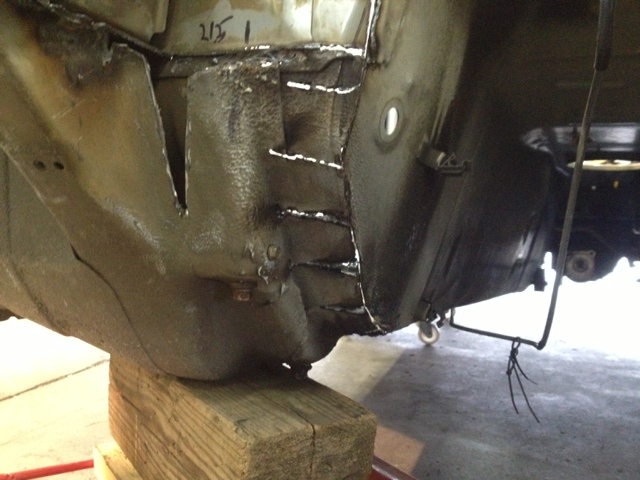
Used the BFH (large hammer) to knock and wack the sides of the tunnel outwards. Took some measurements, then folded the ears over with said hammer. Photo doesn't show the flattened corner which we did later. 2-1/2# hammer is your friend.
Inside pic sorta shows the tunnel widened and the initial 4" tab cut for upper tranny clearance. ...Disregard the horizontal cut that was an impromptu extra slice when we were working to remove the extra bracing just on the other side. At least its straight - and can be easily fixed with the MIG.
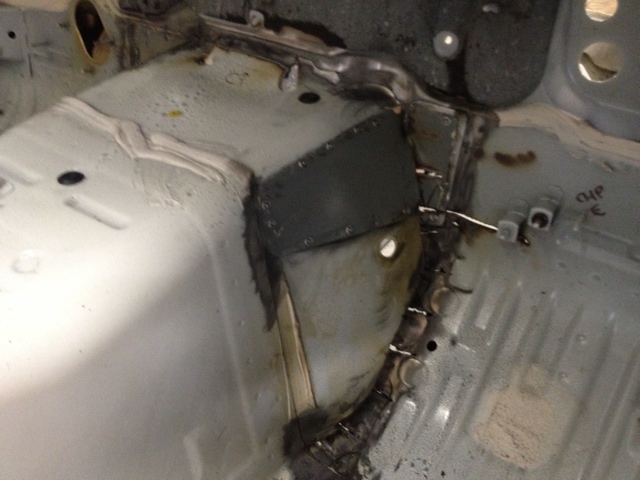
Next up, at some point, will be to install the V8R alum oil pan, and trial-fit the engine & tranny for any clearance issues. I will then weld up and use lots of seam sealer and paint.
Brother from VA made this happen - thanks HOLT !! Now, get busy!
Clean work - just the somewhat rough plasma edges left behind - will tidy up later. Notice the FM instructions page displayed -- gotta follow directions!!!
Cut a "V" so this whole back corner can be flattened out for upcoming fuel line routing and to comply with FM's build statement "the general idea is to make the engine bay a square box." Well said.
Made the initial, vertical plasma cut for widening the tunnel at the top from the engine bay. Holt did the remaining 95% from inside the car.
Next, we cut about 2" horizontal tabs every 2" or so to allow for easy folding. Did those from inside the car as well.
Used the BFH (large hammer) to knock and wack the sides of the tunnel outwards. Took some measurements, then folded the ears over with said hammer. Photo doesn't show the flattened corner which we did later. 2-1/2# hammer is your friend.
Inside pic sorta shows the tunnel widened and the initial 4" tab cut for upper tranny clearance. ...Disregard the horizontal cut that was an impromptu extra slice when we were working to remove the extra bracing just on the other side. At least its straight - and can be easily fixed with the MIG.
Next up, at some point, will be to install the V8R alum oil pan, and trial-fit the engine & tranny for any clearance issues. I will then weld up and use lots of seam sealer and paint.
Last edited by ToySnakePMC; 03-24-2013 at 09:30 PM.
03-24-2013, 10:44 PM
#20
V8 Miata Noob
Join Date: Dec 2009
Posts: 6
Likes: 0
Received 0 Likes
on
0 Posts
What part number did you use for the water pump? I used 89018052 and Amazon had it for ~$188.
03-25-2013, 02:04 PM
#21
Jim Stainer
For what it's worth this is the CTS-V Setup:
ACDelco 12560115 Harmonic Balancer - About $60 on Amazon
ACDelco 12568996 Main Idler Pulley - About $32 on Amazon
LS3 Water Pump 19180610 - Crate Take-off - About $110 on eBay
Also for what it's worth I'm 99% sure can use F body stuff if you put the fans on the front of the radiator. I'll let you know for sure in May...
03-25-2013, 02:49 PM
#22
V8 Miata Noob
Join Date: Dec 2009
Posts: 6
Likes: 0
Received 0 Likes
on
0 Posts
For what it's worth this is the CTS-V Setup:
ACDelco 12560115 Harmonic Balancer - About $60 on Amazon
ACDelco 12568996 Main Idler Pulley - About $32 on Amazon
LS3 Water Pump 19180610 - Crate Take-off - About $110 on eBay
Also for what it's worth I'm 99% sure can use F body stuff if you put the fans on the front of the radiator. I'll let you know for sure in May...
ACDelco 12560115 Harmonic Balancer - About $60 on Amazon
ACDelco 12568996 Main Idler Pulley - About $32 on Amazon
LS3 Water Pump 19180610 - Crate Take-off - About $110 on eBay
Also for what it's worth I'm 99% sure can use F body stuff if you put the fans on the front of the radiator. I'll let you know for sure in May...
I'm going to stick with 12635649 even though it costs a little more b/c its spec'd for the latest Camaro LS3 and I figure I want to stay away from the old rumors of wobbly dampeners on GTOs, Corvettes and the like.
And I'm going to stick with 89018052 (LS2?) for the water pump b/c it keeps the water neck on the passenger side of the pulley (makes it a little easier to go to FM radiator. The latest LS3 spec water pump put the neck on the driver side of the pulley.
Looks like ToySnake went with the GMB OE replacmeent pump to get the $108 price.
Not sure why you have the main idler pulley listed. I think its included in the CTS-V FEAD kit 19155066 (and Jegs is cheapest I've found for that kit so far @ $800 plus shipping, Chevrolet Performance 19155066 Chevrolet Performance Serpentine Belt Drive Systems)
I think you're right about the F-body stuff but I already have FM's V8 radiator and fan kit installed in my car so I'm working with that.
Last edited by natepartlan; 03-25-2013 at 02:51 PM.
03-25-2013, 09:06 PM
#23
V8 Miata Fanatic
Thread Starter
Exactly right on my after-market GMB waterpump. I've had recent success with same brand w/pump on the Jeep Liberty just last month so that helped push me towards this purchase. My front accessories plan, at this time, is to machine down the GTO LS2 alternator bracket and re-use those items. I've priced up thru GMPP dealer, Amazon, and eBay to come up with my CTS-V A/C compressor, bracket, idler and tension pullies, and small belt -- along with CTS-V idler, tension, and big belt. I'm deleting the P/S system and using a manual rack. The above plan looks to be $440 all-in. Cheers.

 03-27-2013, 09:44 AM
#25
V8 Miata Fanatic
Thread Starter
Hadn't really researched that. I know the ATI dampners are highly thought of, but I don't think my stock LS2 is in need of this as of yet. Do you like the underdrive feature for some sustained high RPM situations or occassional track day? Thanks!


